Installation & Setup
GitHub or GitLab users can follow the outlined steps to successfully enable Greptile within their repositories. Log in to your Greptile account or sign up via email, Google, Github, or GitLab. Ensure you have the required permissions to allow the AI code reviewer access to all or specific repos. Each platform offers a different procedure for integration.GitHub App installation
The GitHub app gives Greptile access to your repositories and lets it post reviews on pull requests.1
Open Code Providers
Go to Code Providers. Click Connect GitHub Cloud or Add Provider, then select GitHub.
2
Choose a GitHub account or organization
In GitHub, choose the account or organization where you want to install Greptile Apps. Use Configure for an existing installation.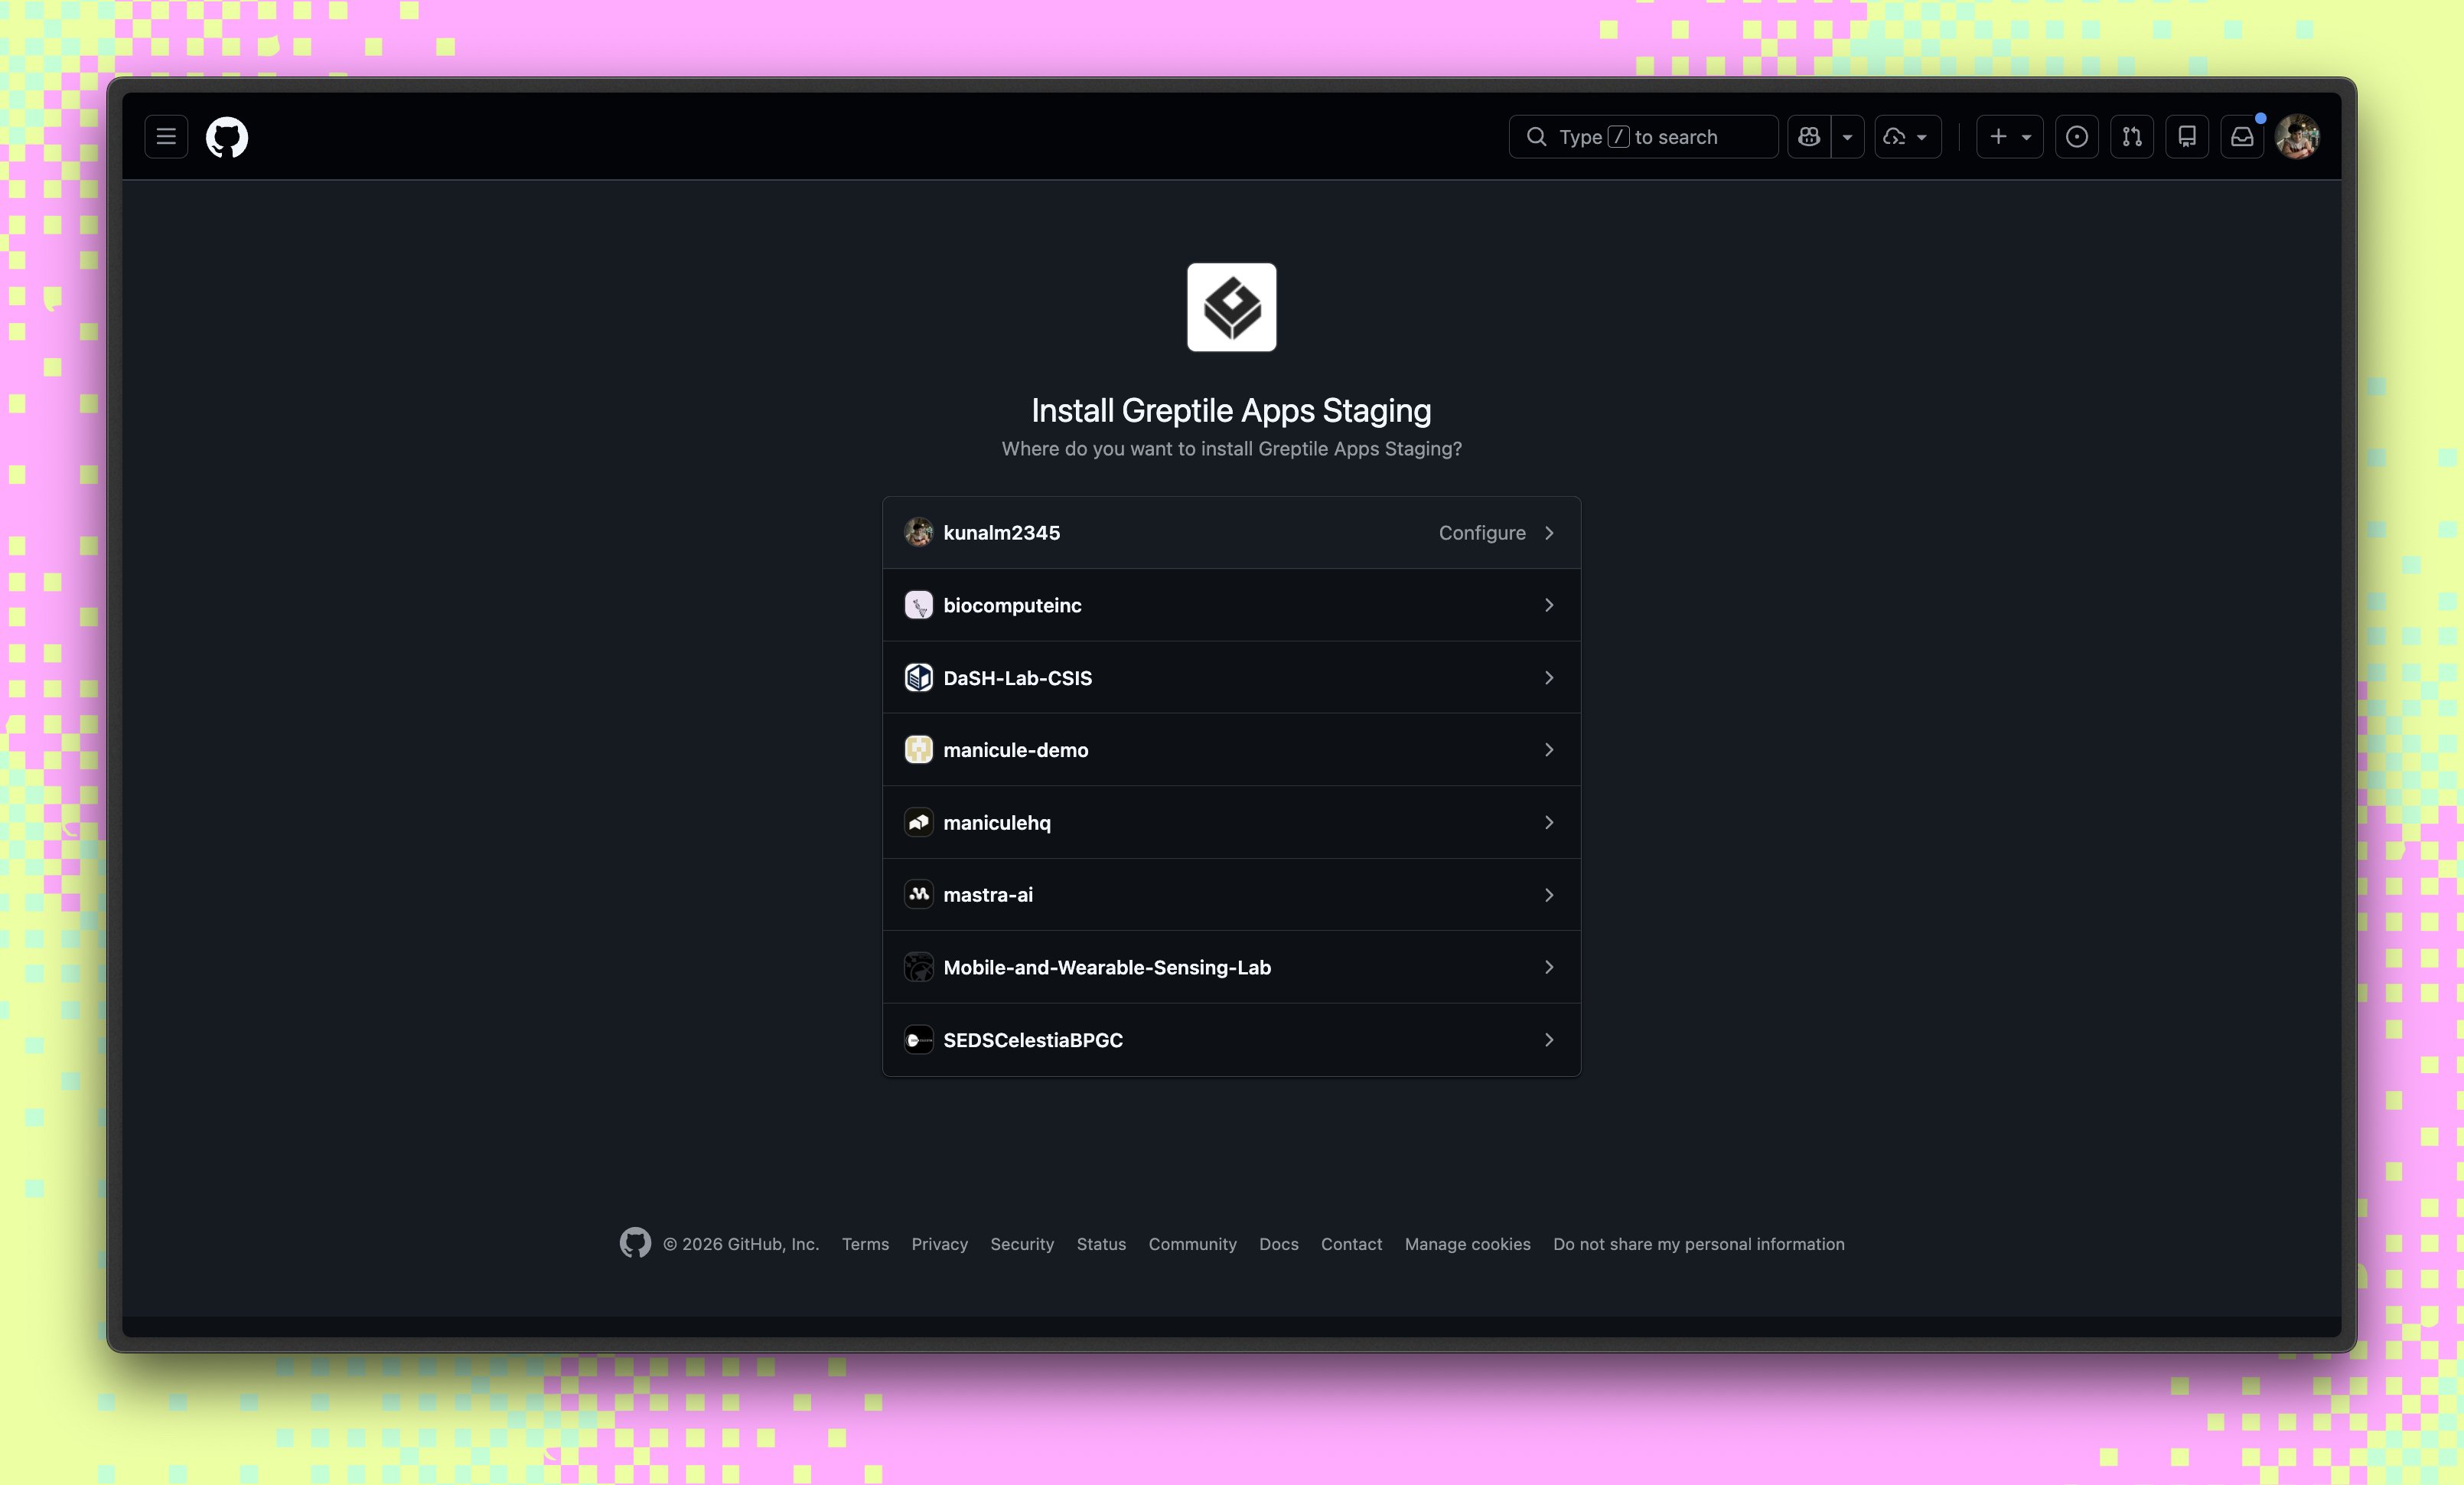
3
Grant repository access
Select which repositories GitHub lets Greptile access: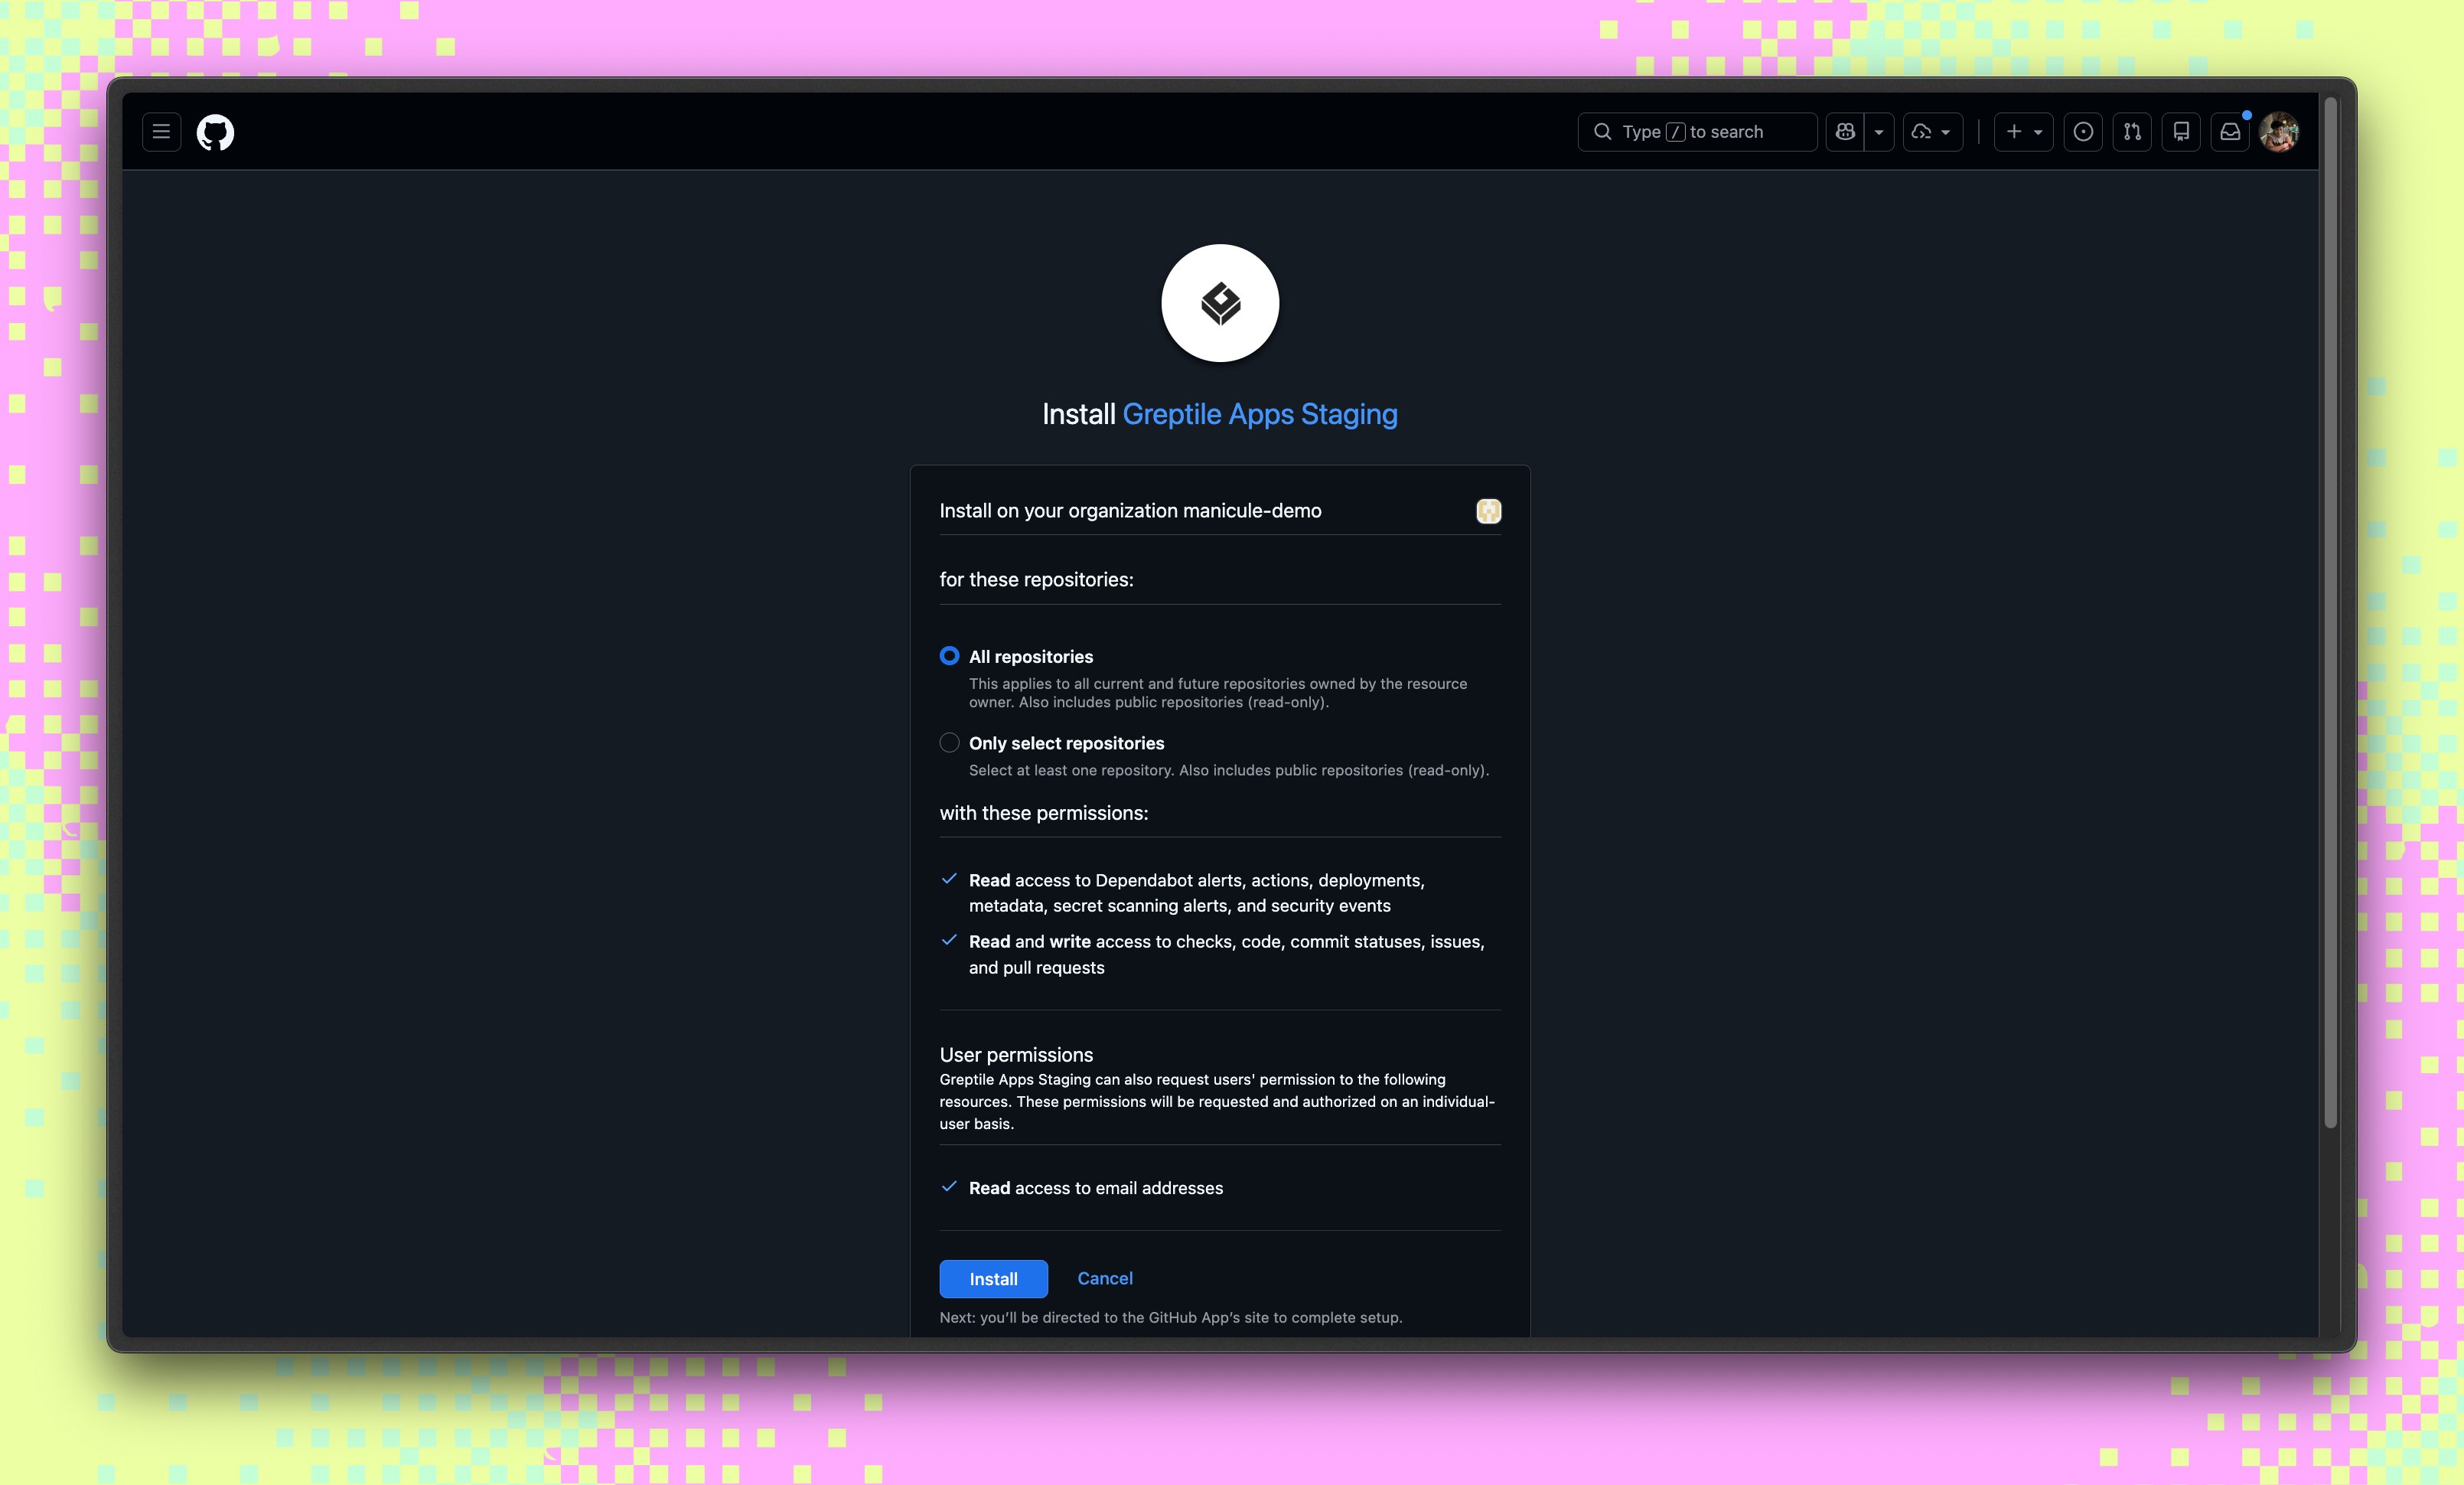
- All repositories: Grant access to all current and future repositories in the account or organization.
- Only select repositories: Grant access only to selected repositories. Select at least one repository.
4
Link the GitHub organization in Greptile
After you click Install, GitHub automatically returns you to Greptile. Select the GitHub organization, then click Link.You can add more organizations later from Code Providers.
5
Enable repositories for review
Select the repositories you want Greptile to review, then click Enable.Use Enable All to turn on all repositories that GitHub granted access to.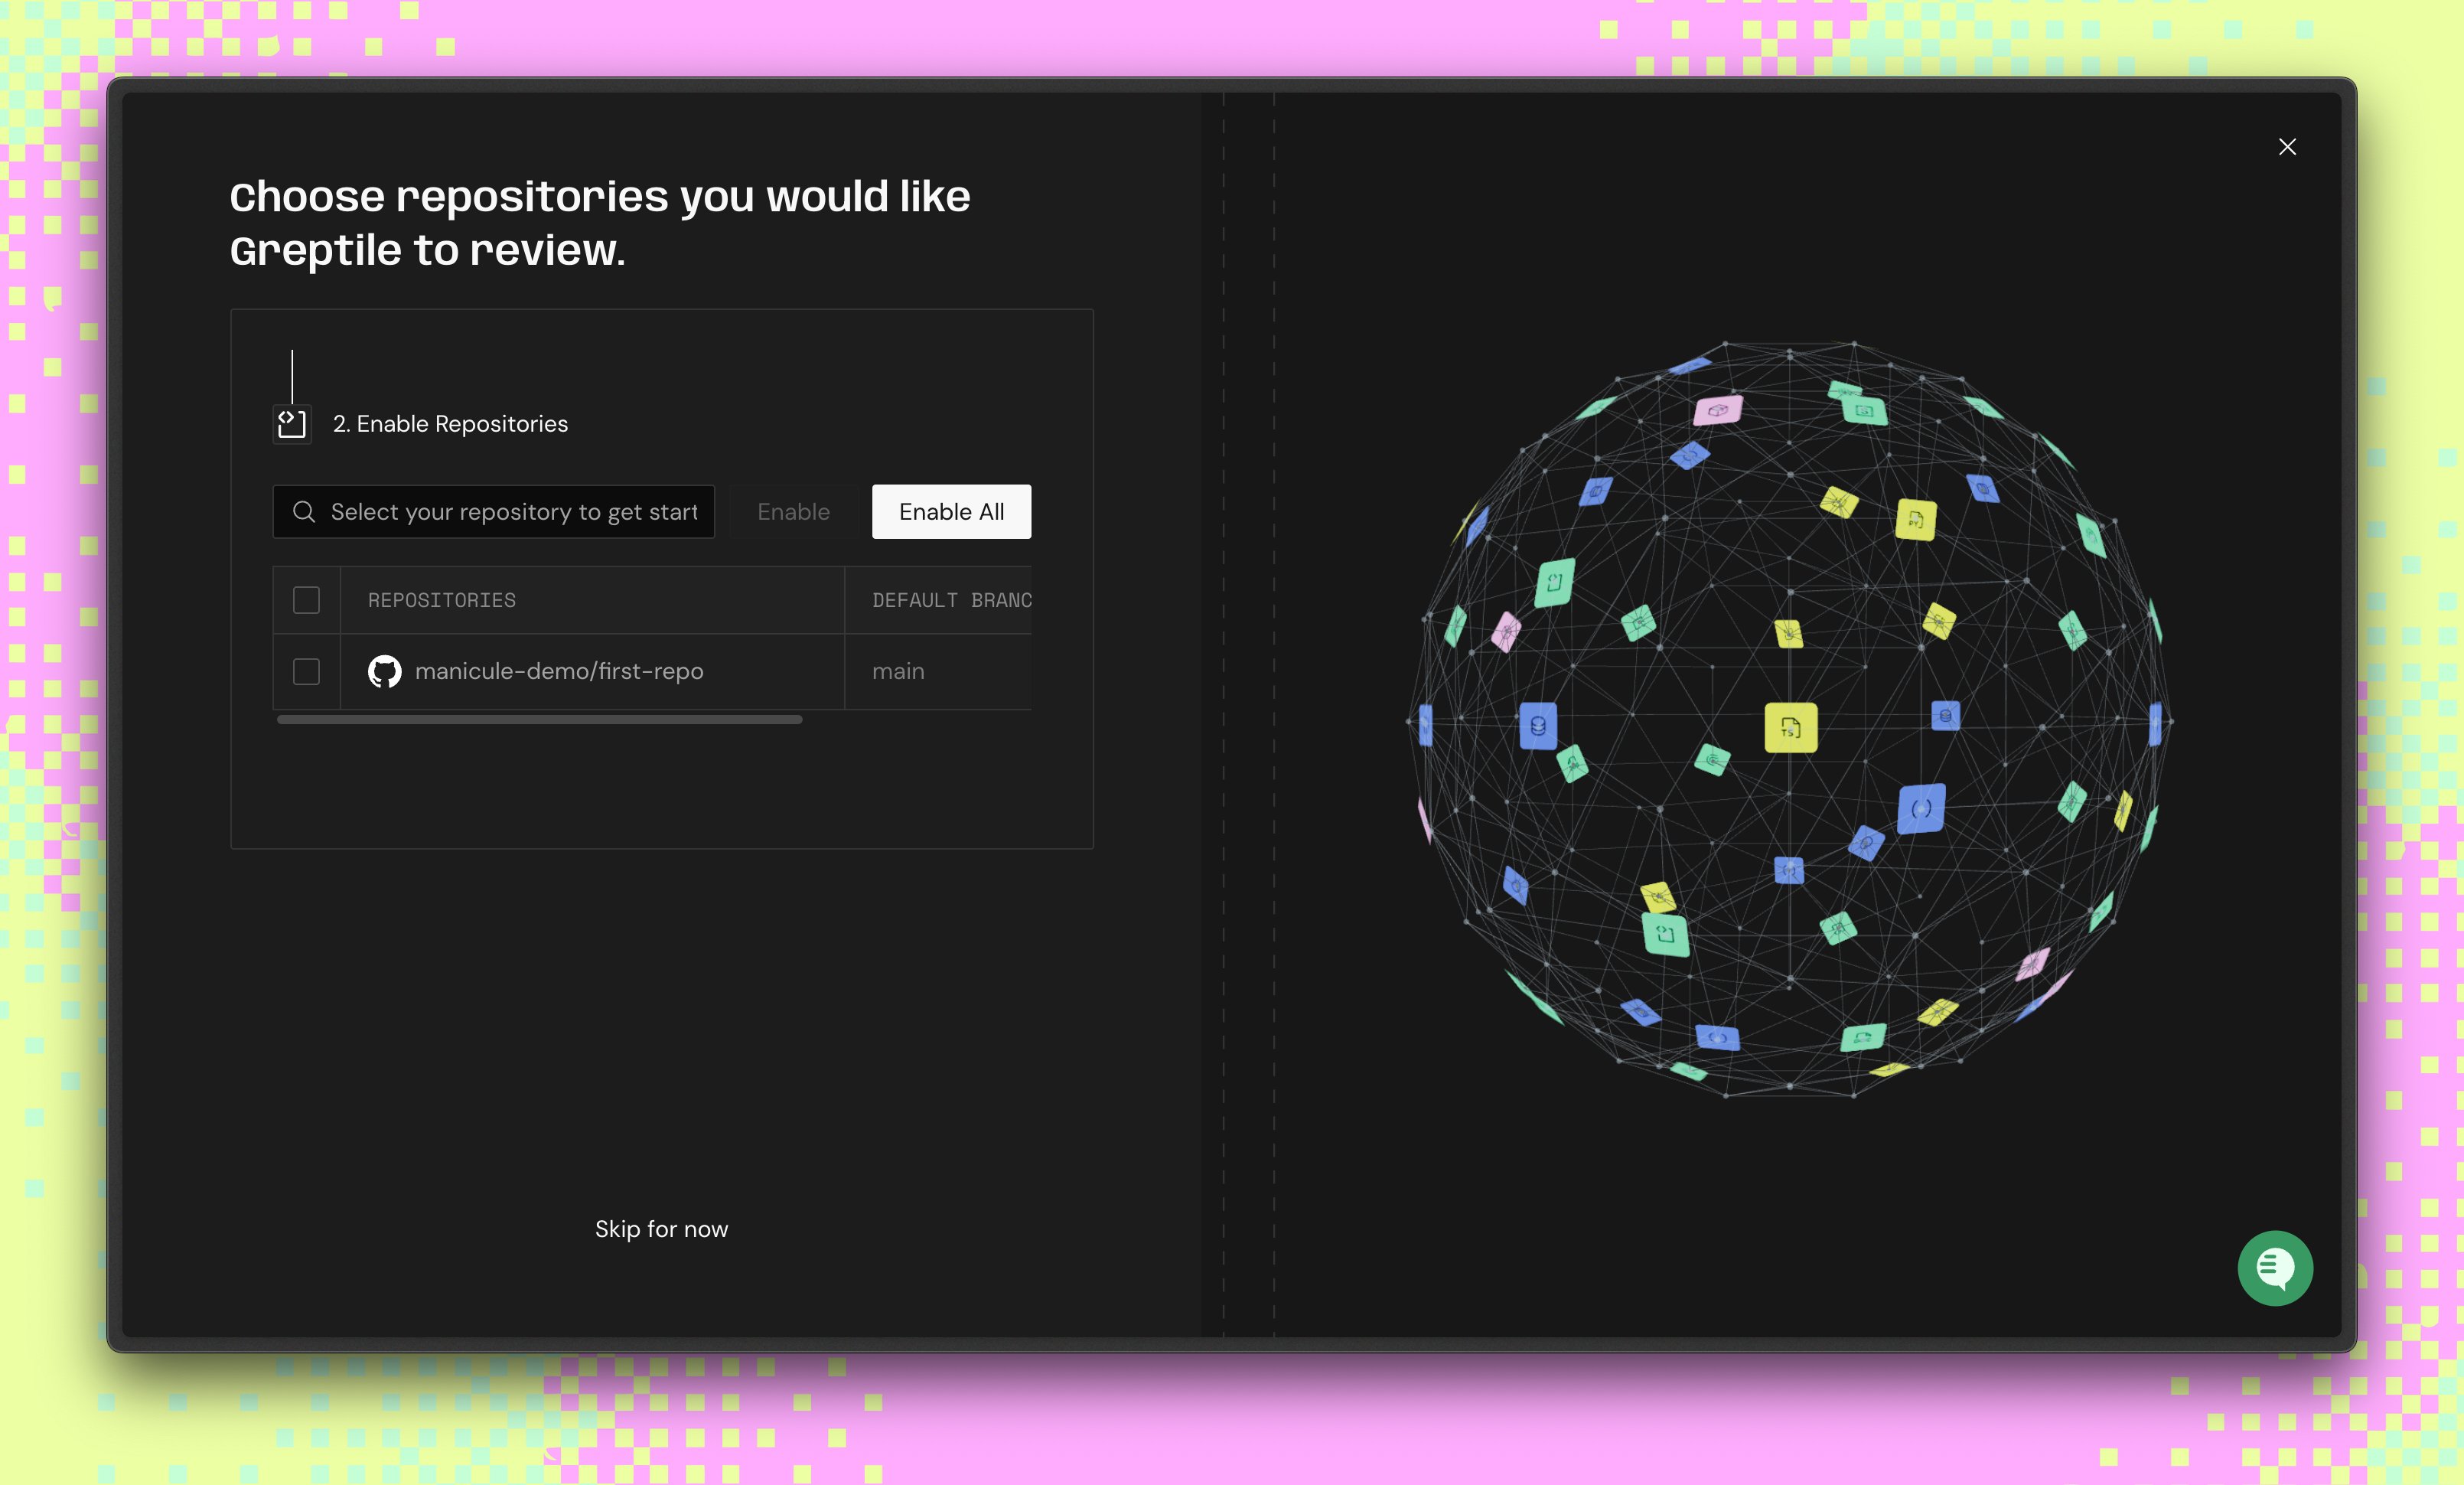
GitLab Integration
Greptile supports GitLab service account personal access tokens, group access tokens, and project access tokens. We recommend a service account because its credentials are not tied to a person. The service account must have the Developer role for the groups or projects Greptile will review. Its personal access token must have theapi scope.
1
Open GitLab integration
Go to Code Providers in Greptile and click Add Provider, then select GitLab. Greptile shows the token requirements and a field for the generated token.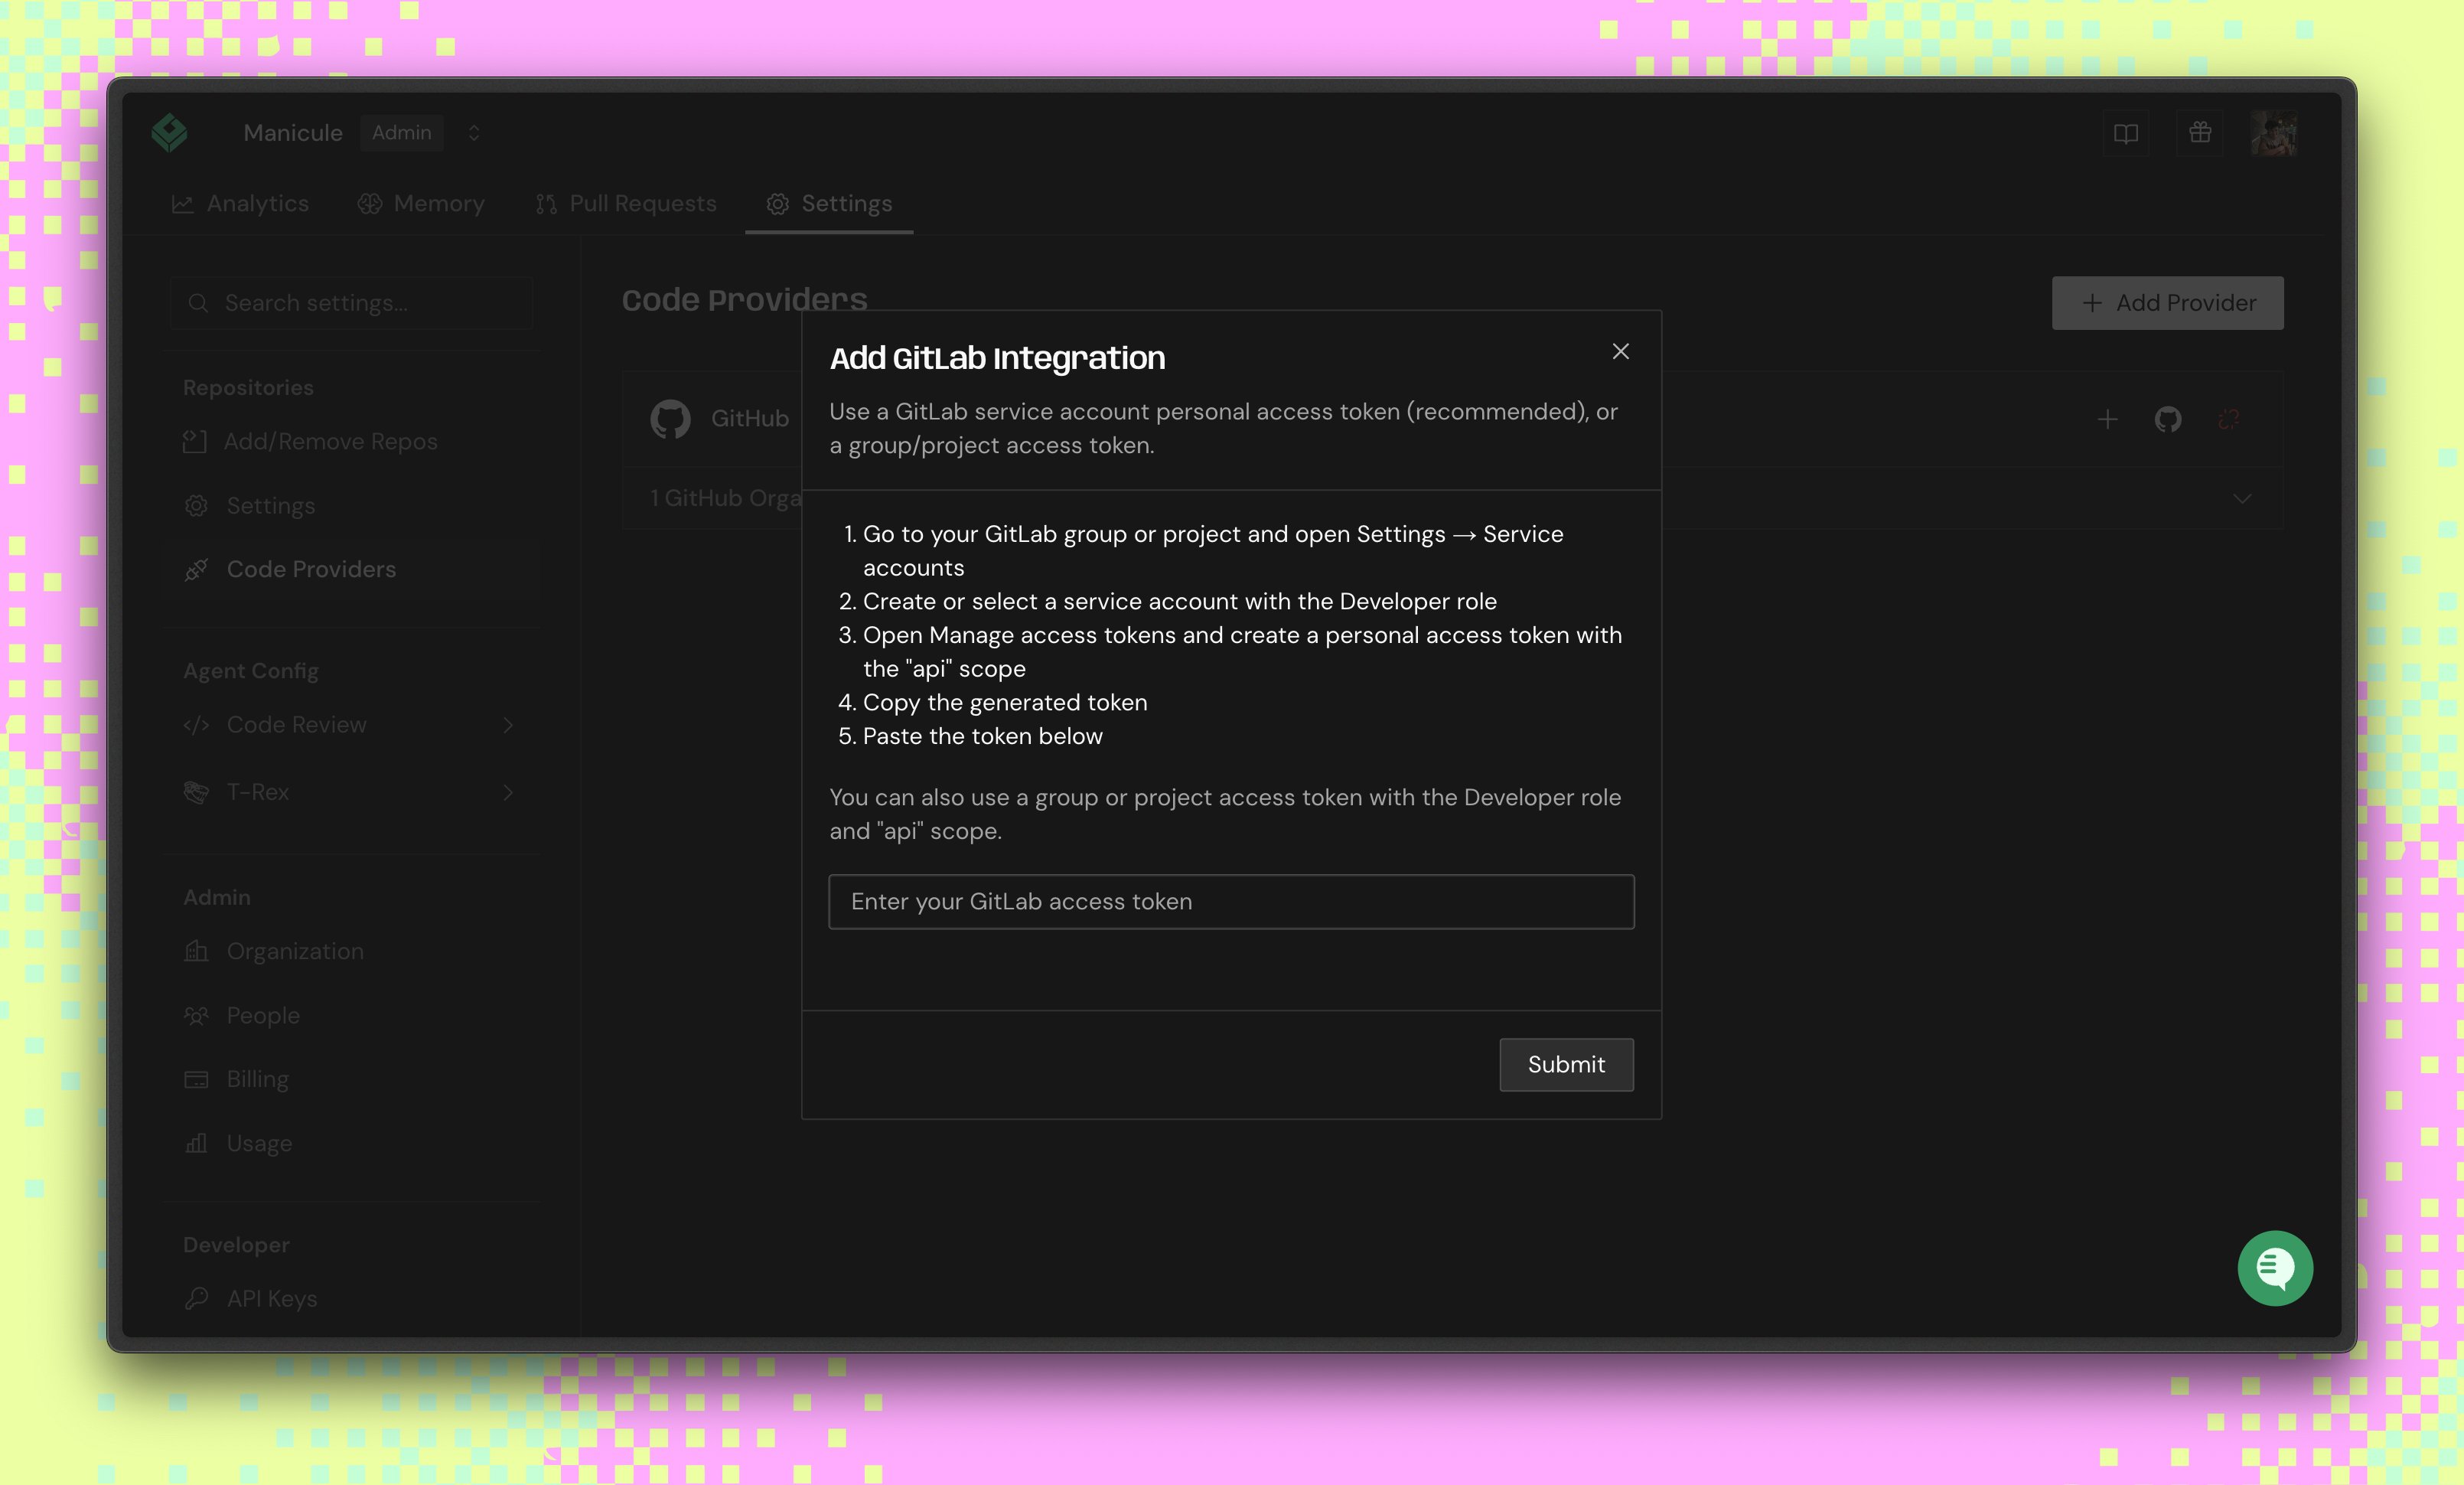
2
Create or select a service account
In GitLab, open the group that contains the projects Greptile needs to review, then go to Settings → Service accounts. Create a service account or select an existing one. Add it to every group or project Greptile needs to access with the Developer role.See GitLab’s service account documentation for details.
3
Create the service account personal access token
From the service account’s menu, select Manage access tokens, then Add new token. Create a personal access token with:
- Token name:
Greptile - Scope:
api - Expiration date: follow your GitLab policy
You can also use a group or project access token. Create it under Settings → Access tokens with the Developer role and
api scope.4
Copy the generated token
Copy the token. GitLab only shows it once.
5
Submit the token in Greptile
Paste the token into the GitLab integration modal, then click Submit.
6
Configure the webhook in GitLab
Greptile generates the details you need to create a GitLab webhook — a URL, a secret token, and the required triggers. The webhook is what lets Greptile review merge requests automatically.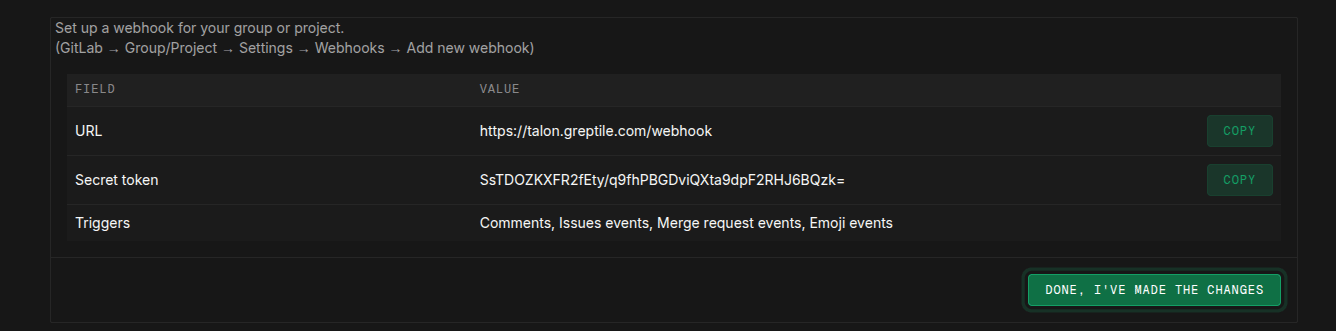
- In GitLab, open your project or group, then go to Settings → Webhooks → Add new webhook.
- Fill in the URL and Secret token from Greptile, and enable the required triggers: Comments, Issues events, Merge request events, and Emoji events.
- Click Add webhook.
- Back in Greptile, click Done, I’ve made the changes.
7
Link the GitLab group
Select the GitLab group, then click Link.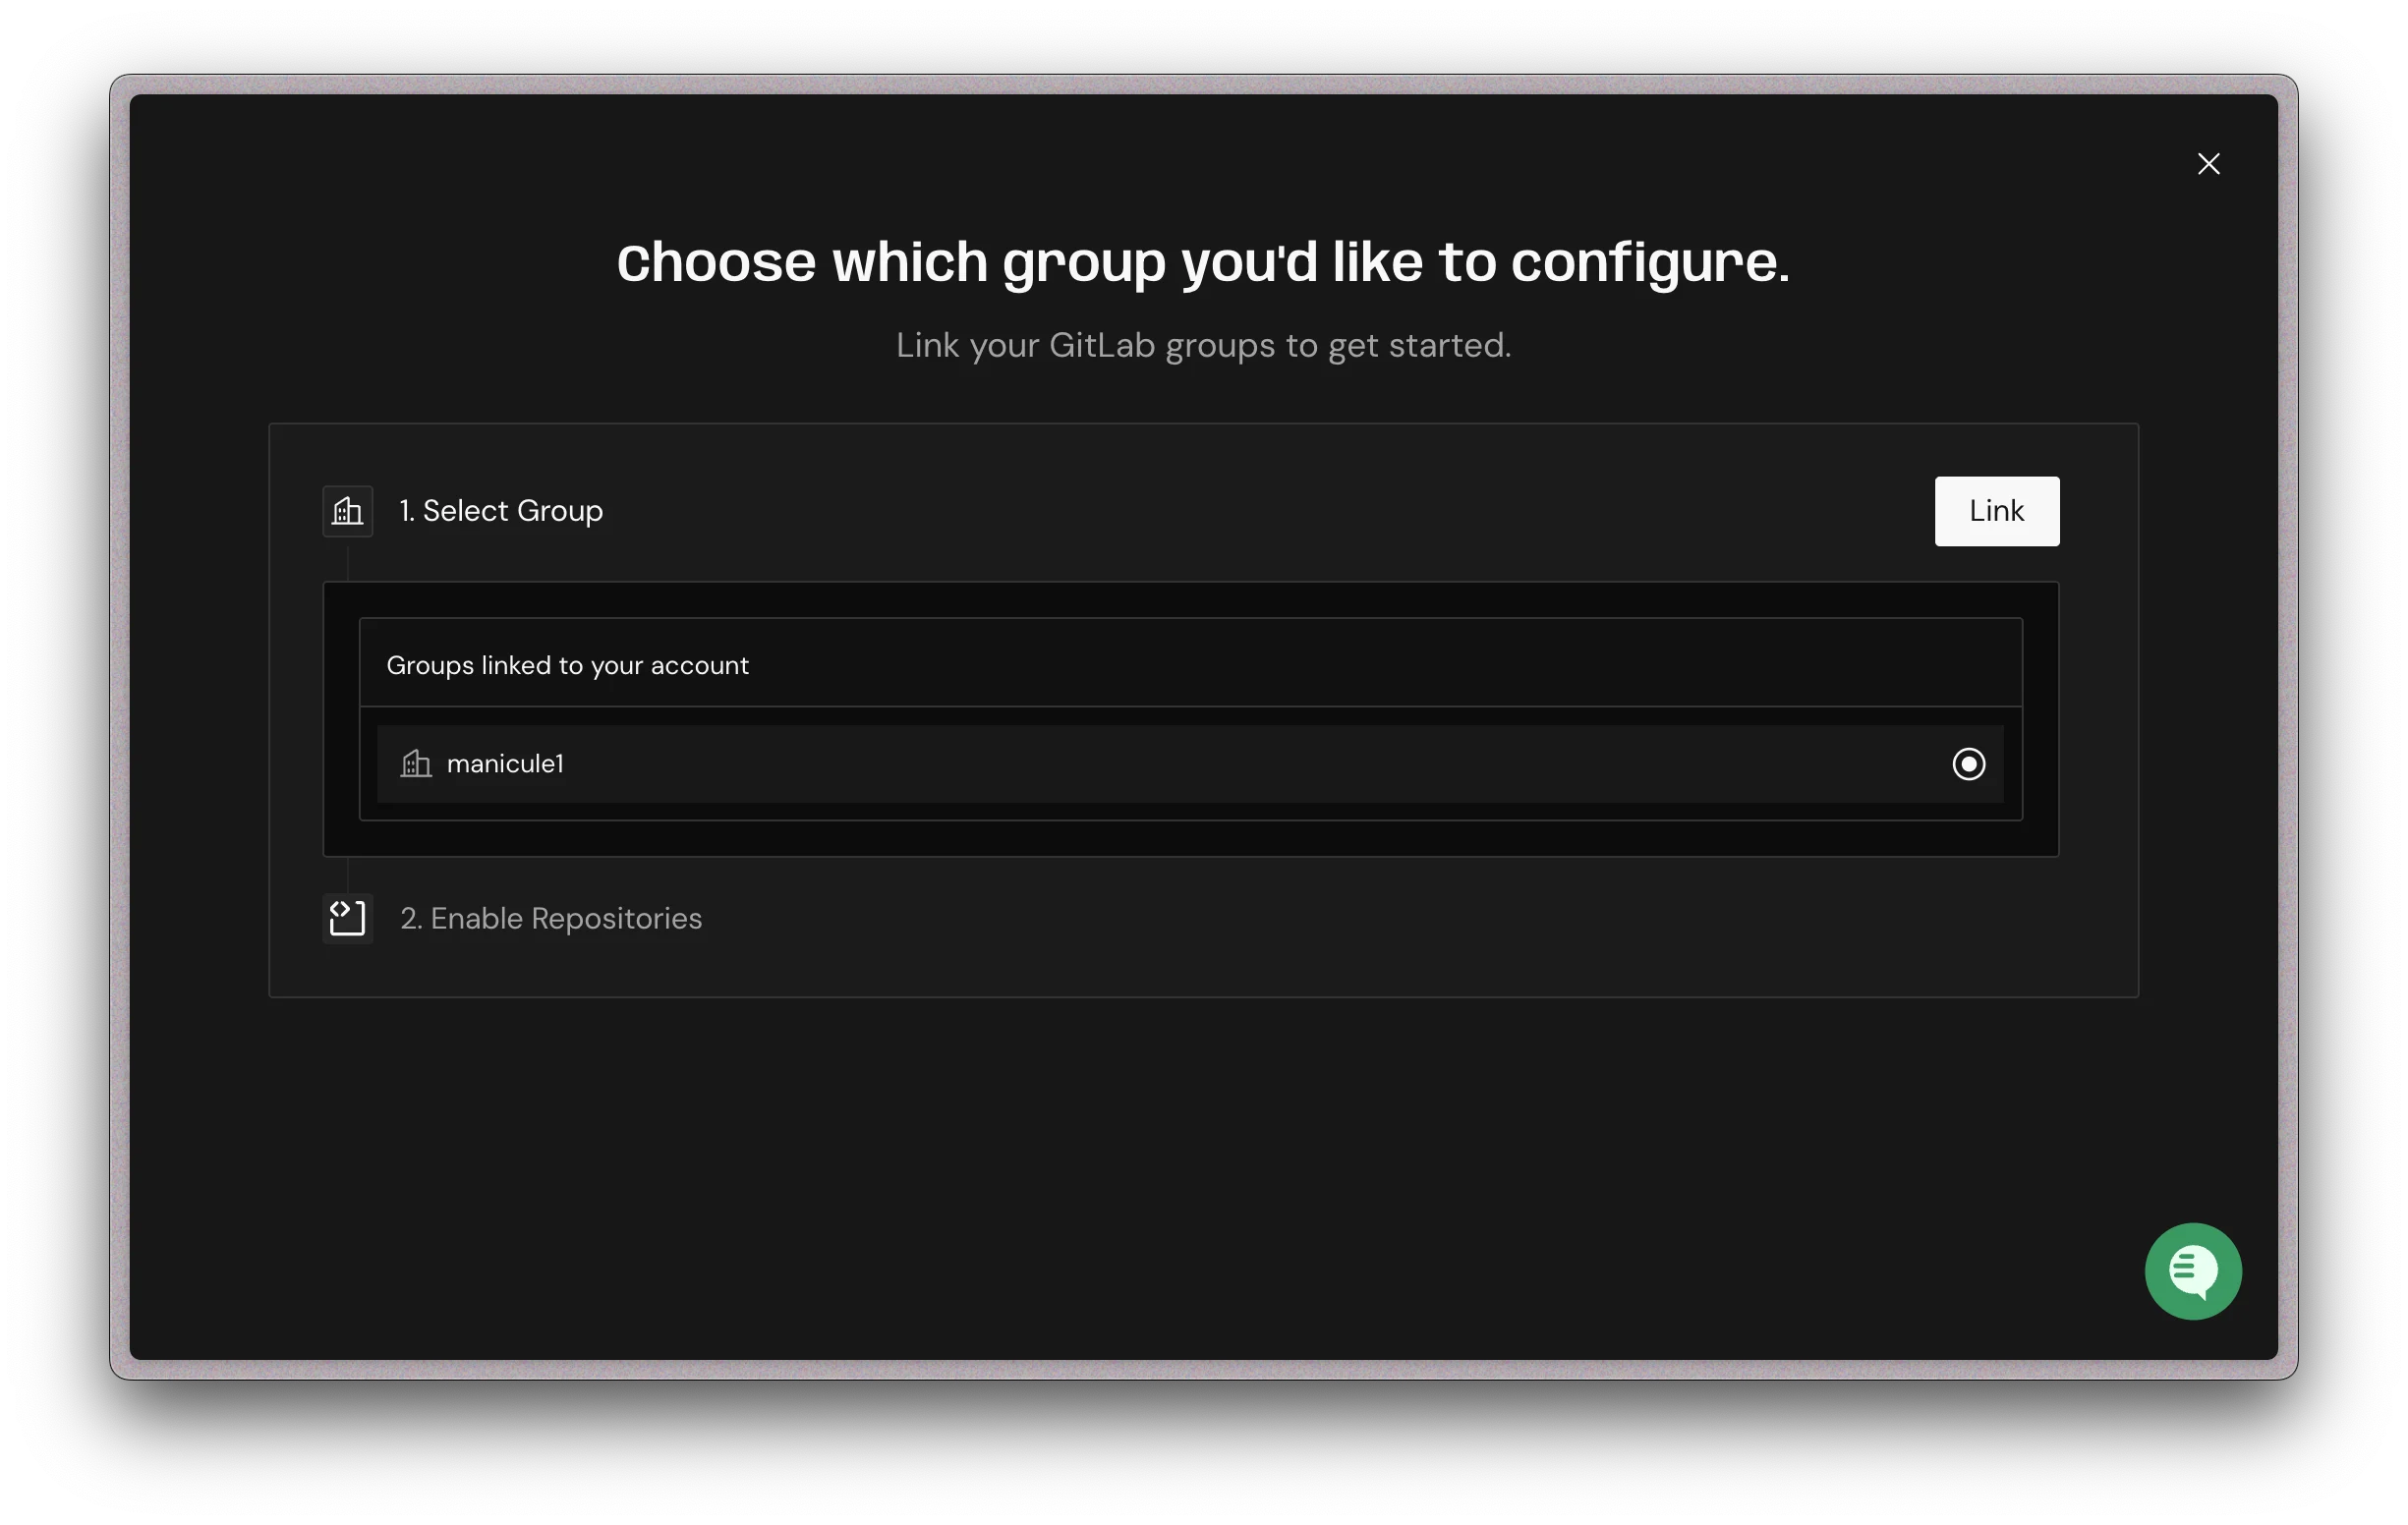
8
Enable repositories for review
Select the GitLab repositories you want Greptile to review, then click Enable.Use Enable All to turn on every listed repository.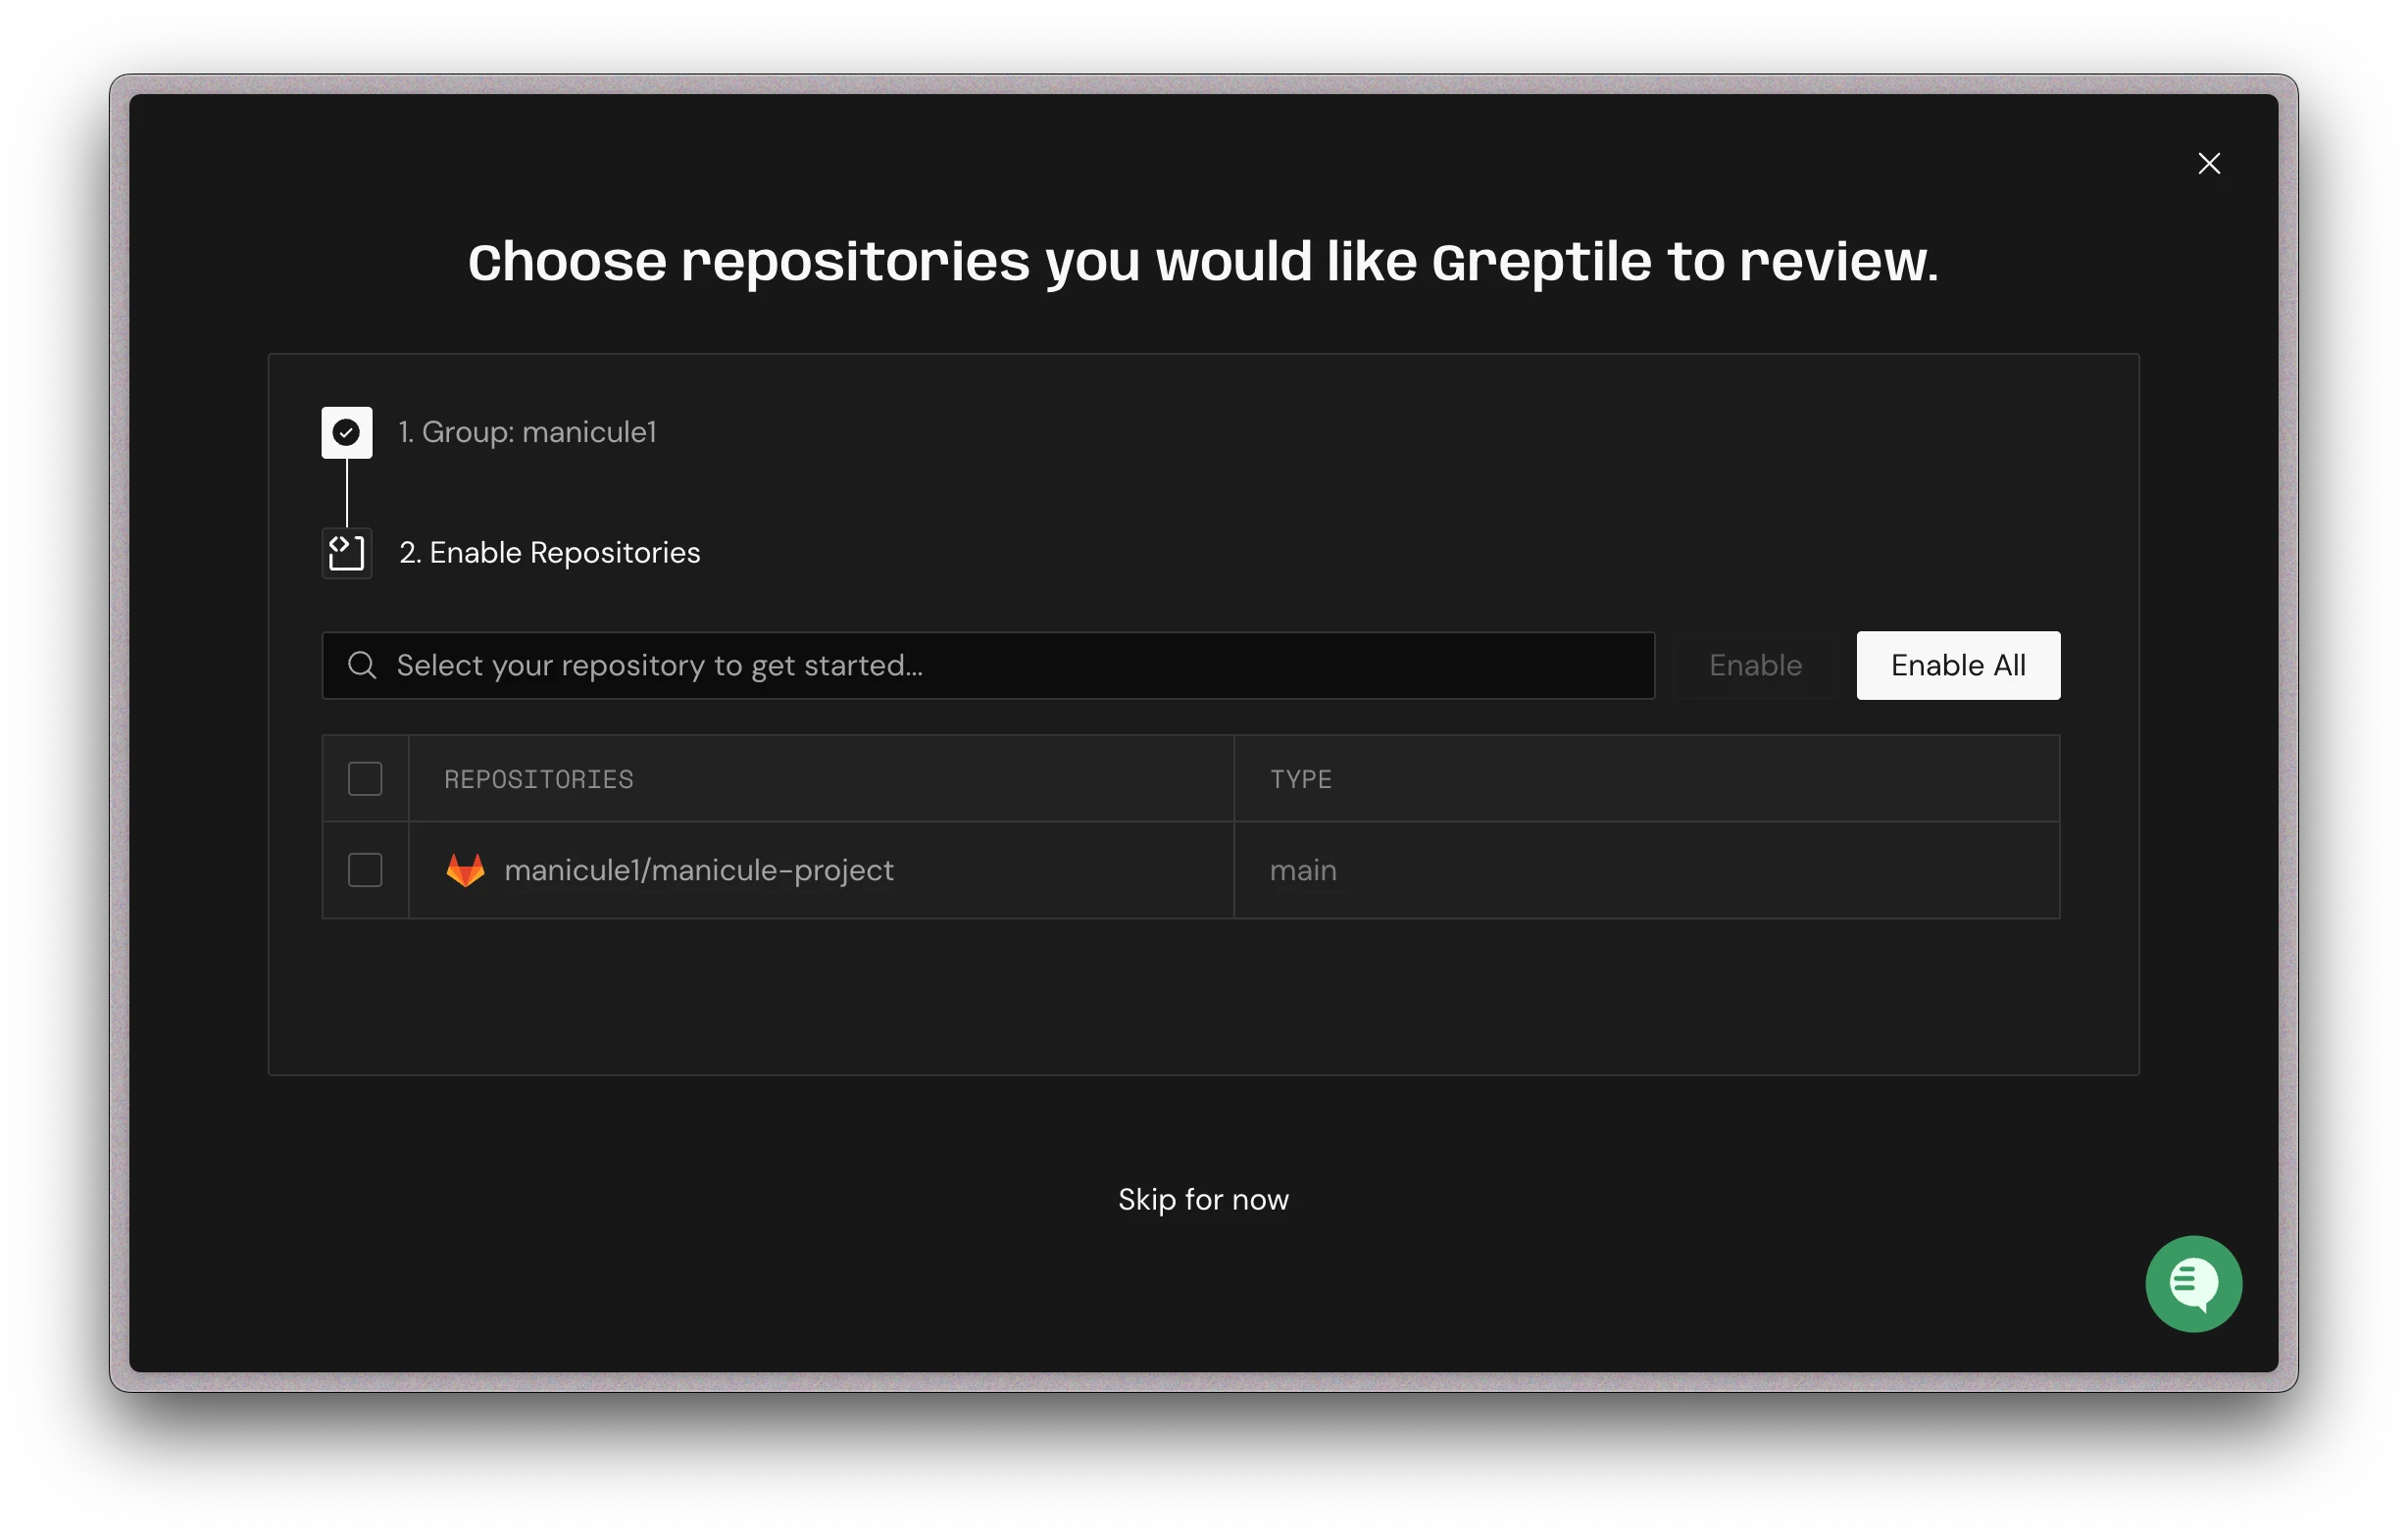
Repository Selection & Configuration
The following configuration steps are common to GitHub and GitLab:1
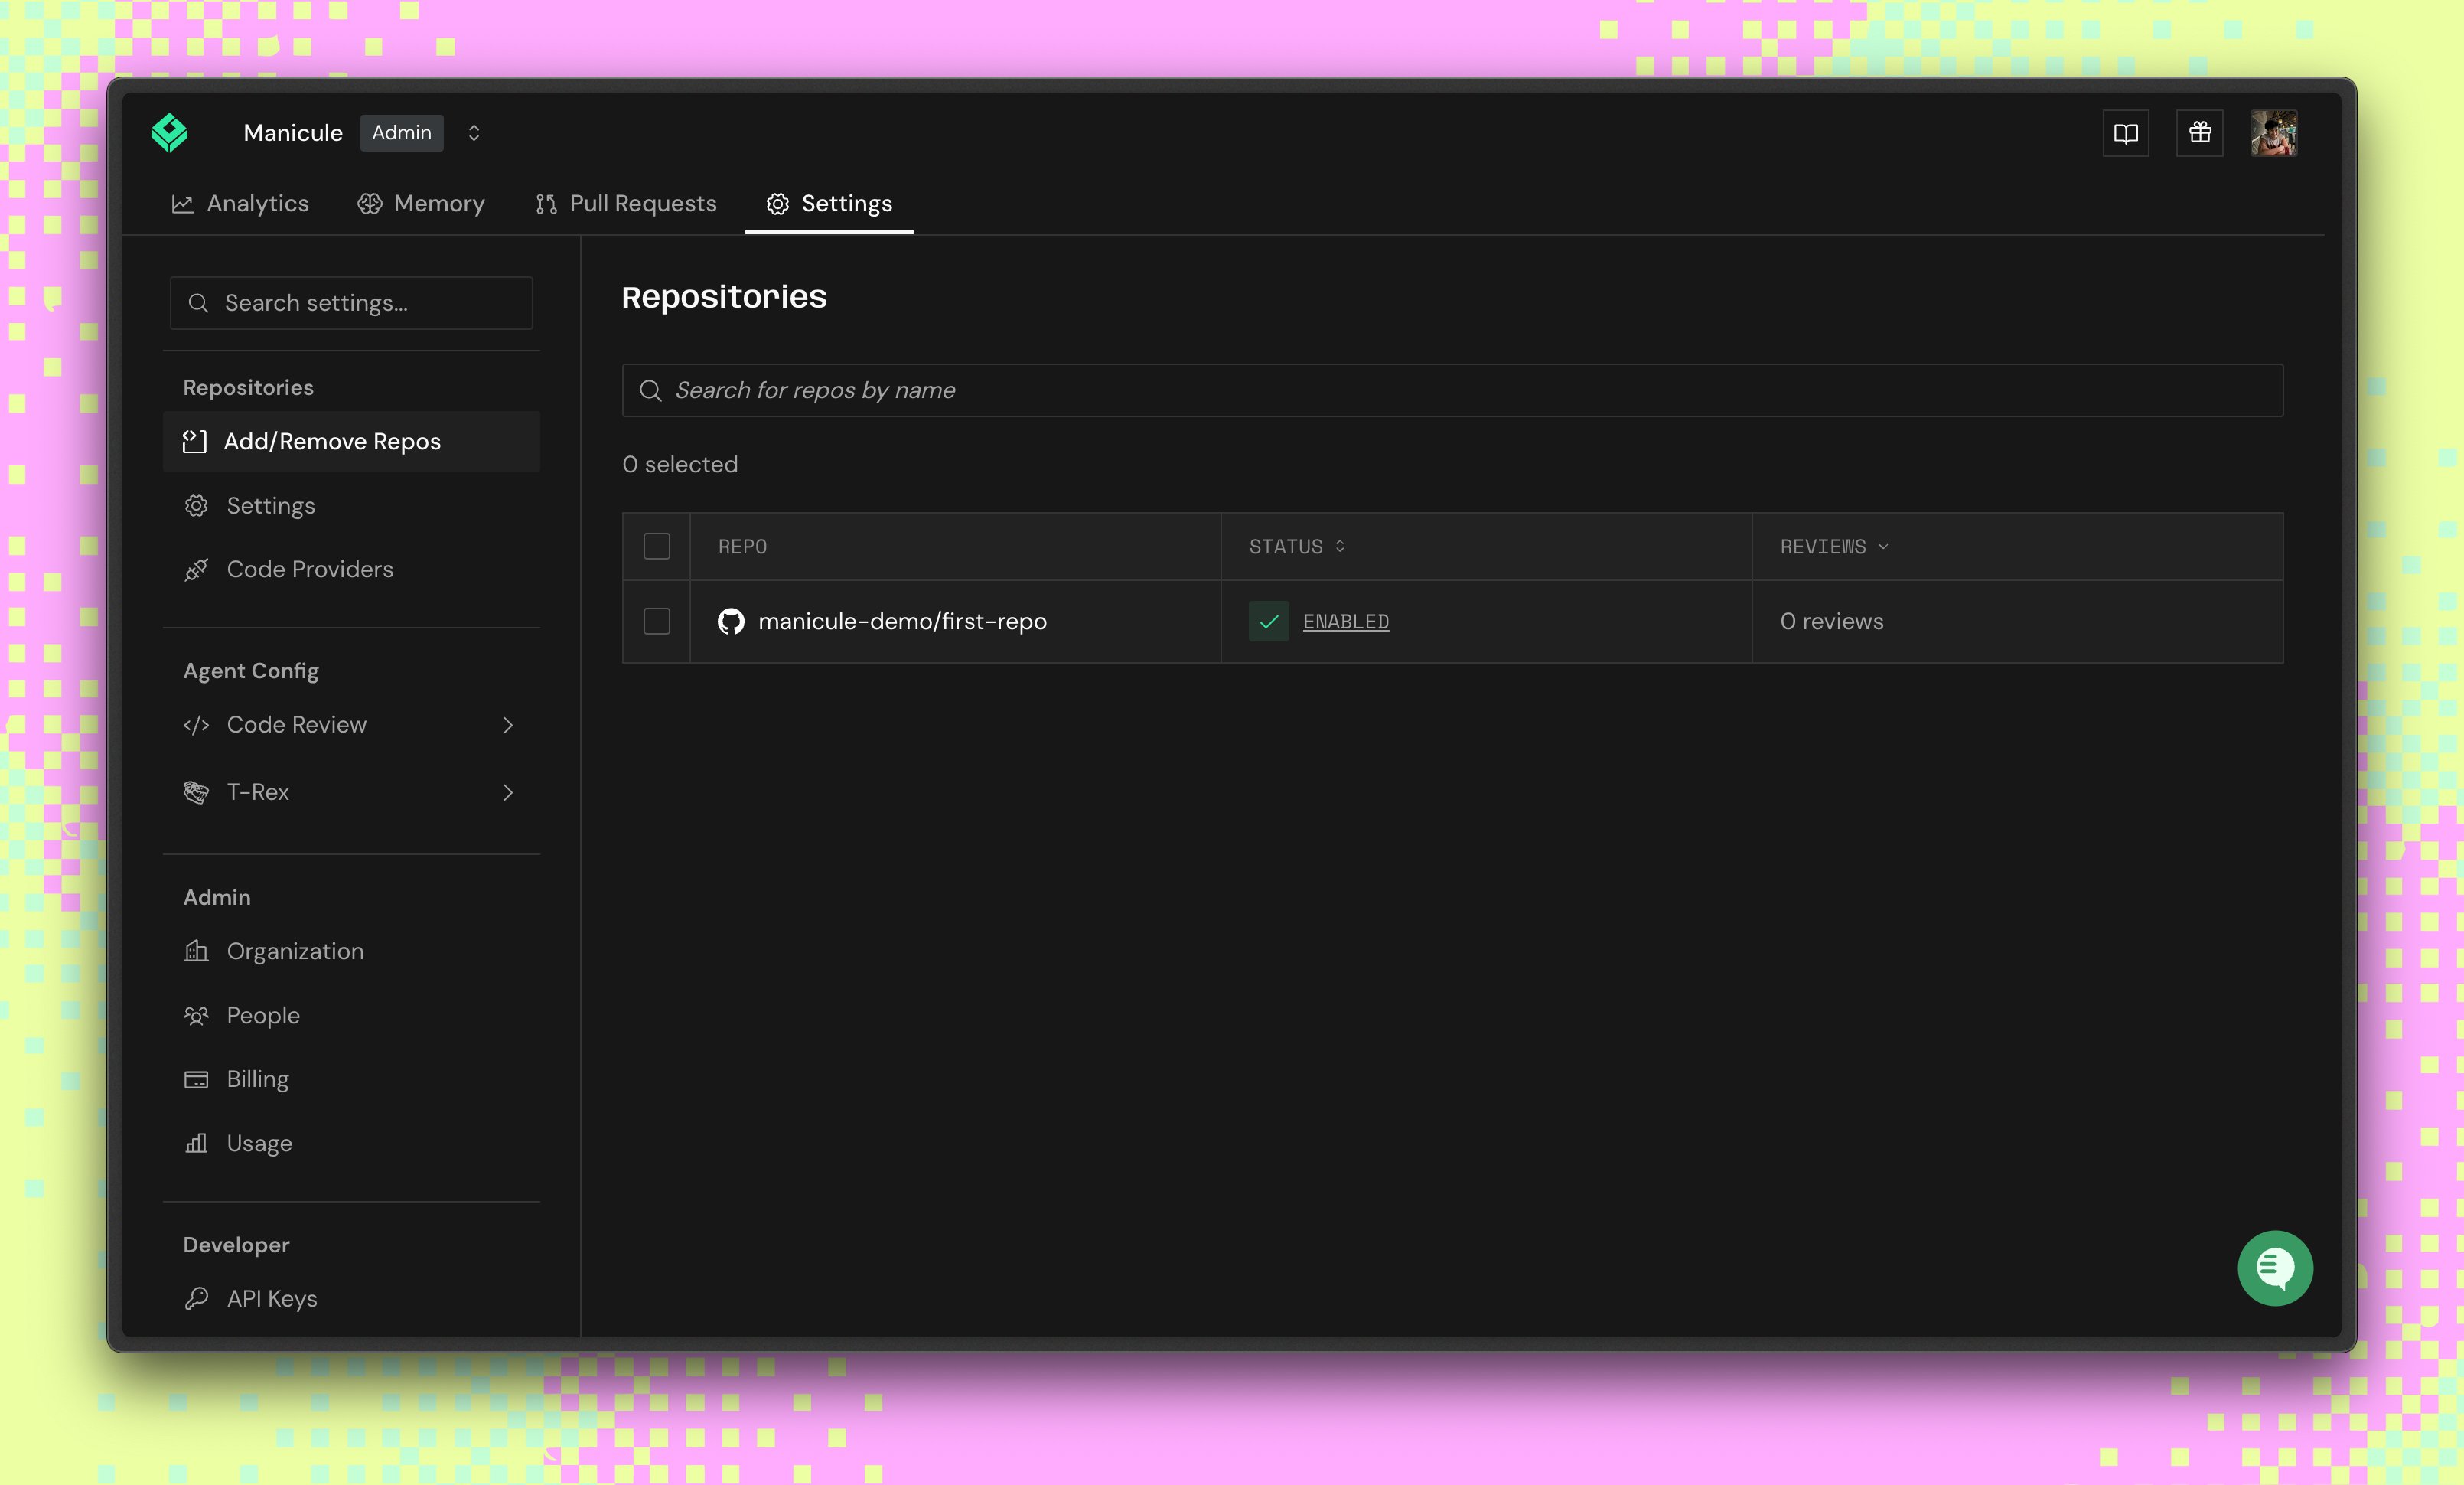
Enable repository indexing by Greptile
- Go to your team’s Repositories page
- Click Manage Repos (or Enable Repositories if no repos are enabled yet)
- Select the repos you want reviewed, then click Enable Repos (or use Enable All)
2
Configure PR Summary
Customize how Greptile summarizes pull requests: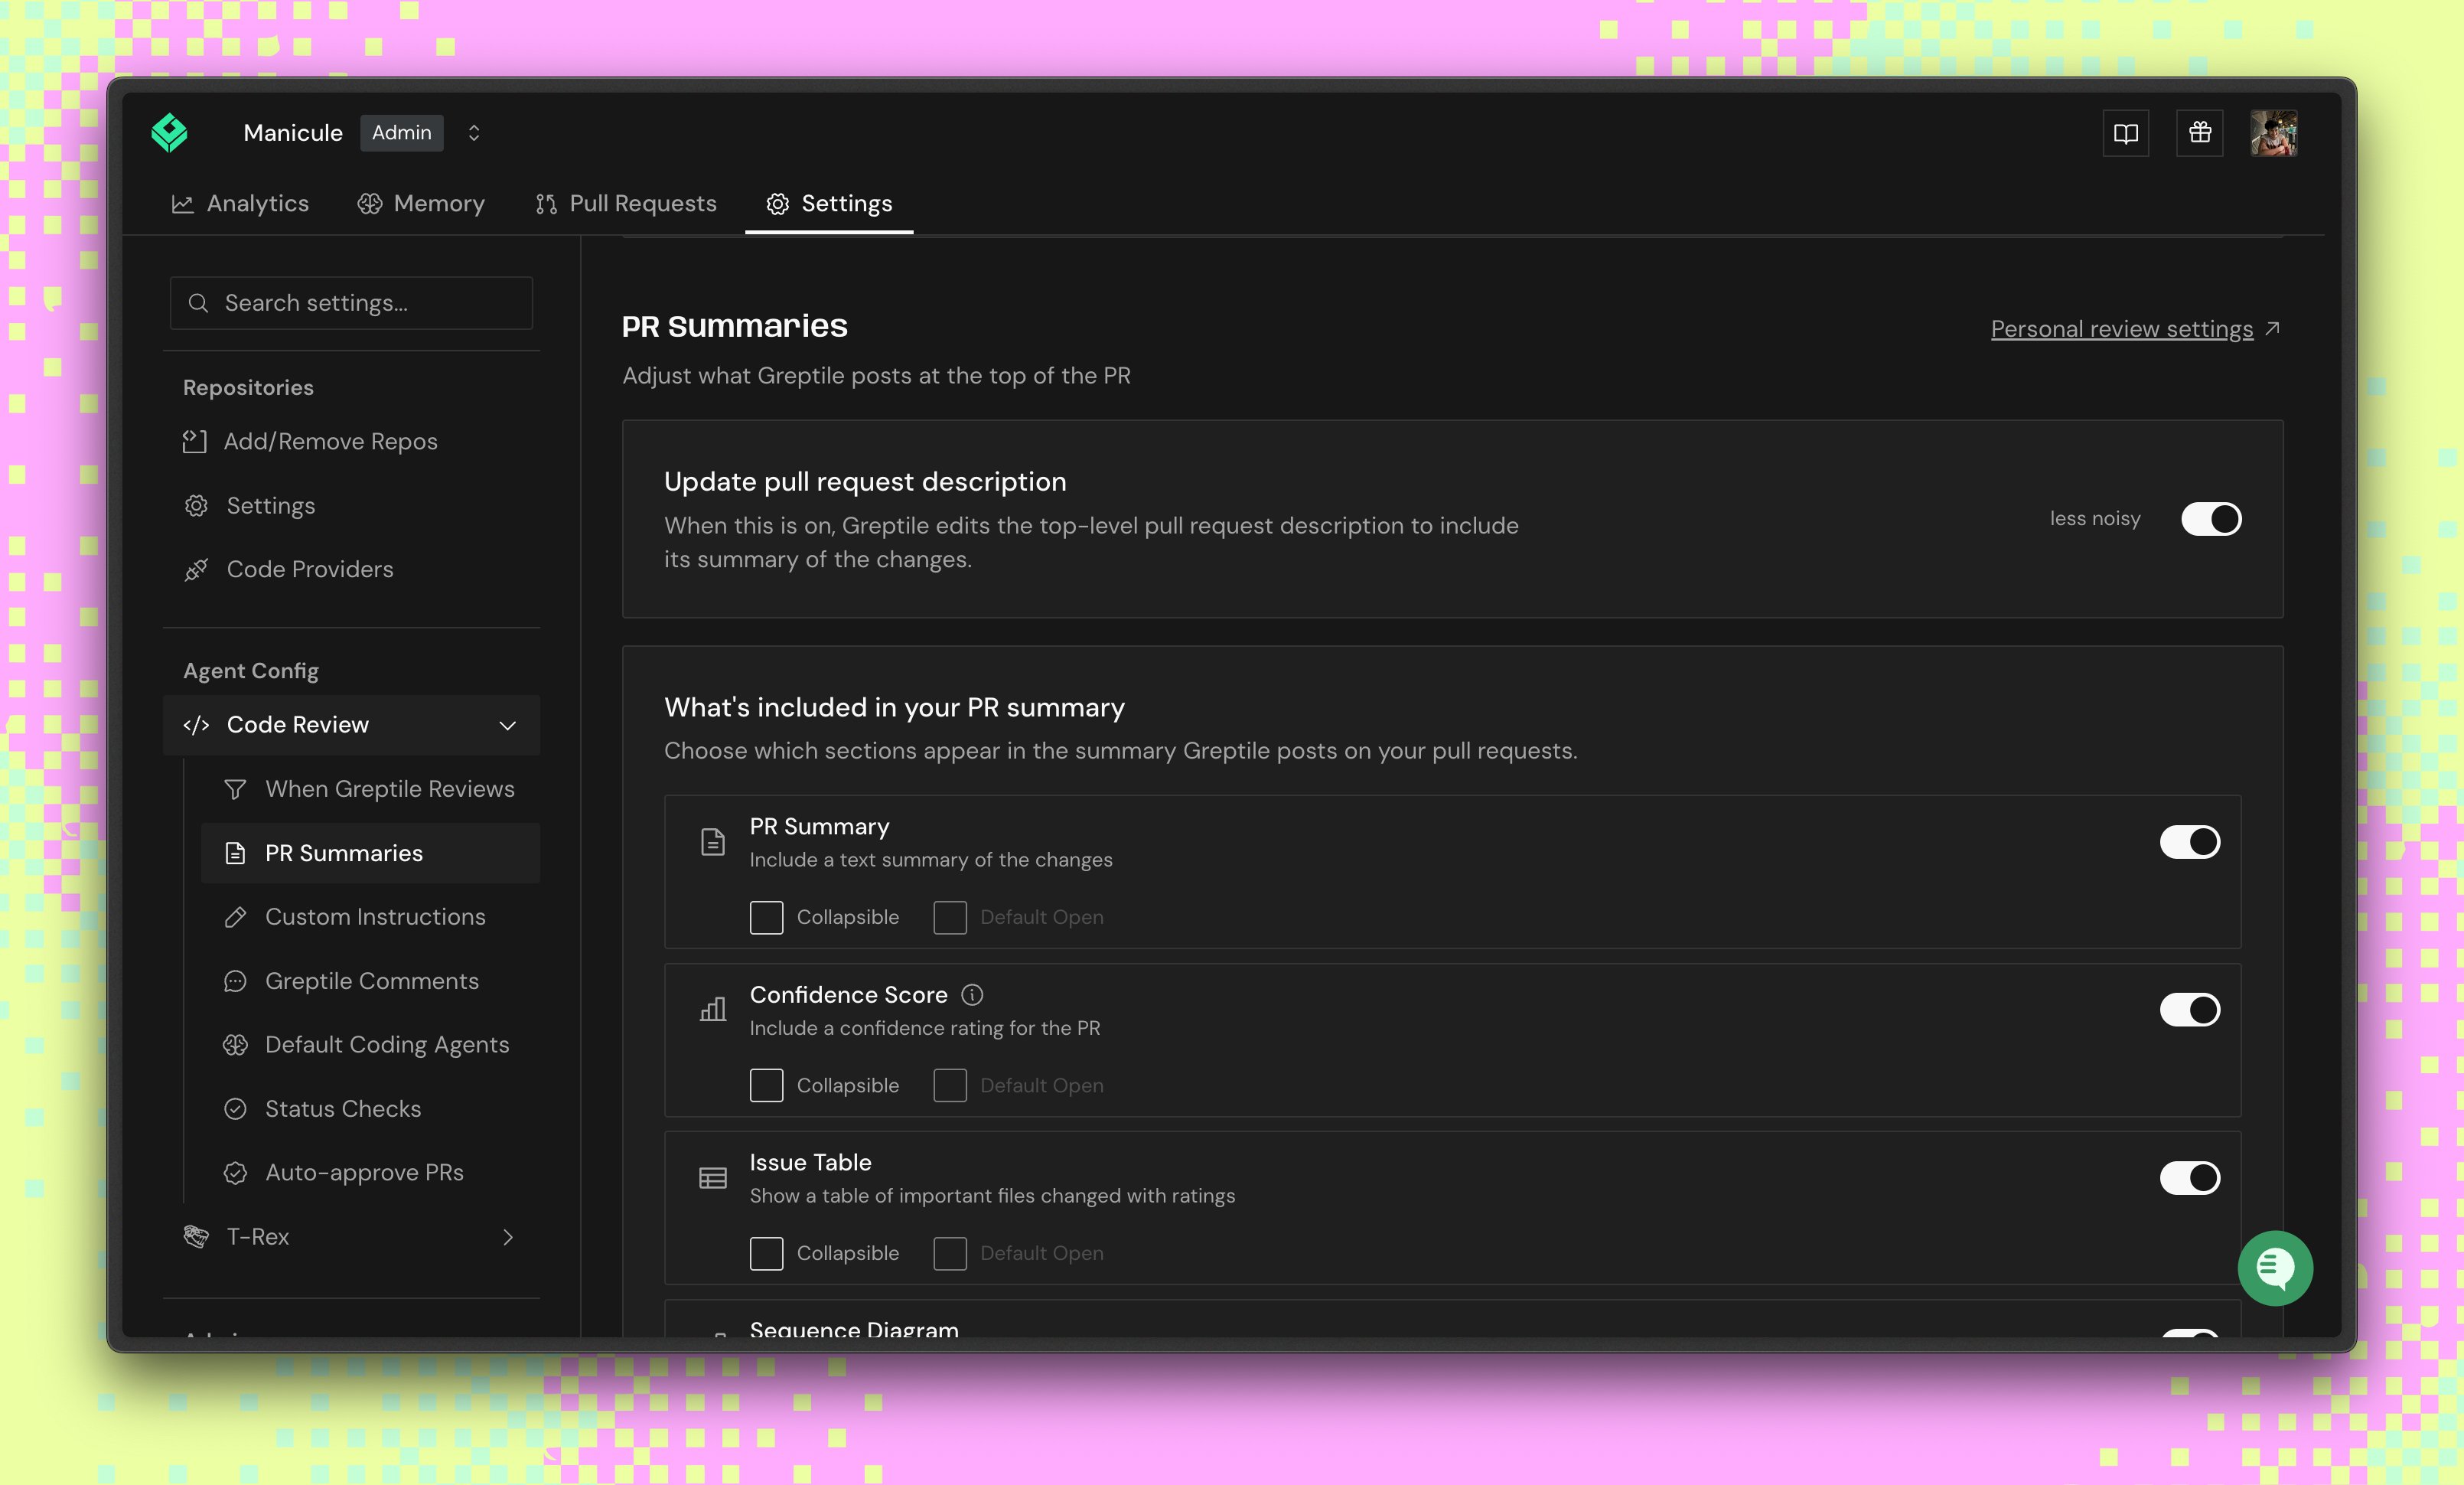
- PR Summary: Include a text summary of the changes
- Confidence Score: Show confidence levels for each PR
- Issue Table: Show important changed files with ratings
- Sequence Diagram: Add a diagram of the changes
3
Control Review Behavior
Configure when Greptile reviews in Code Review Settings: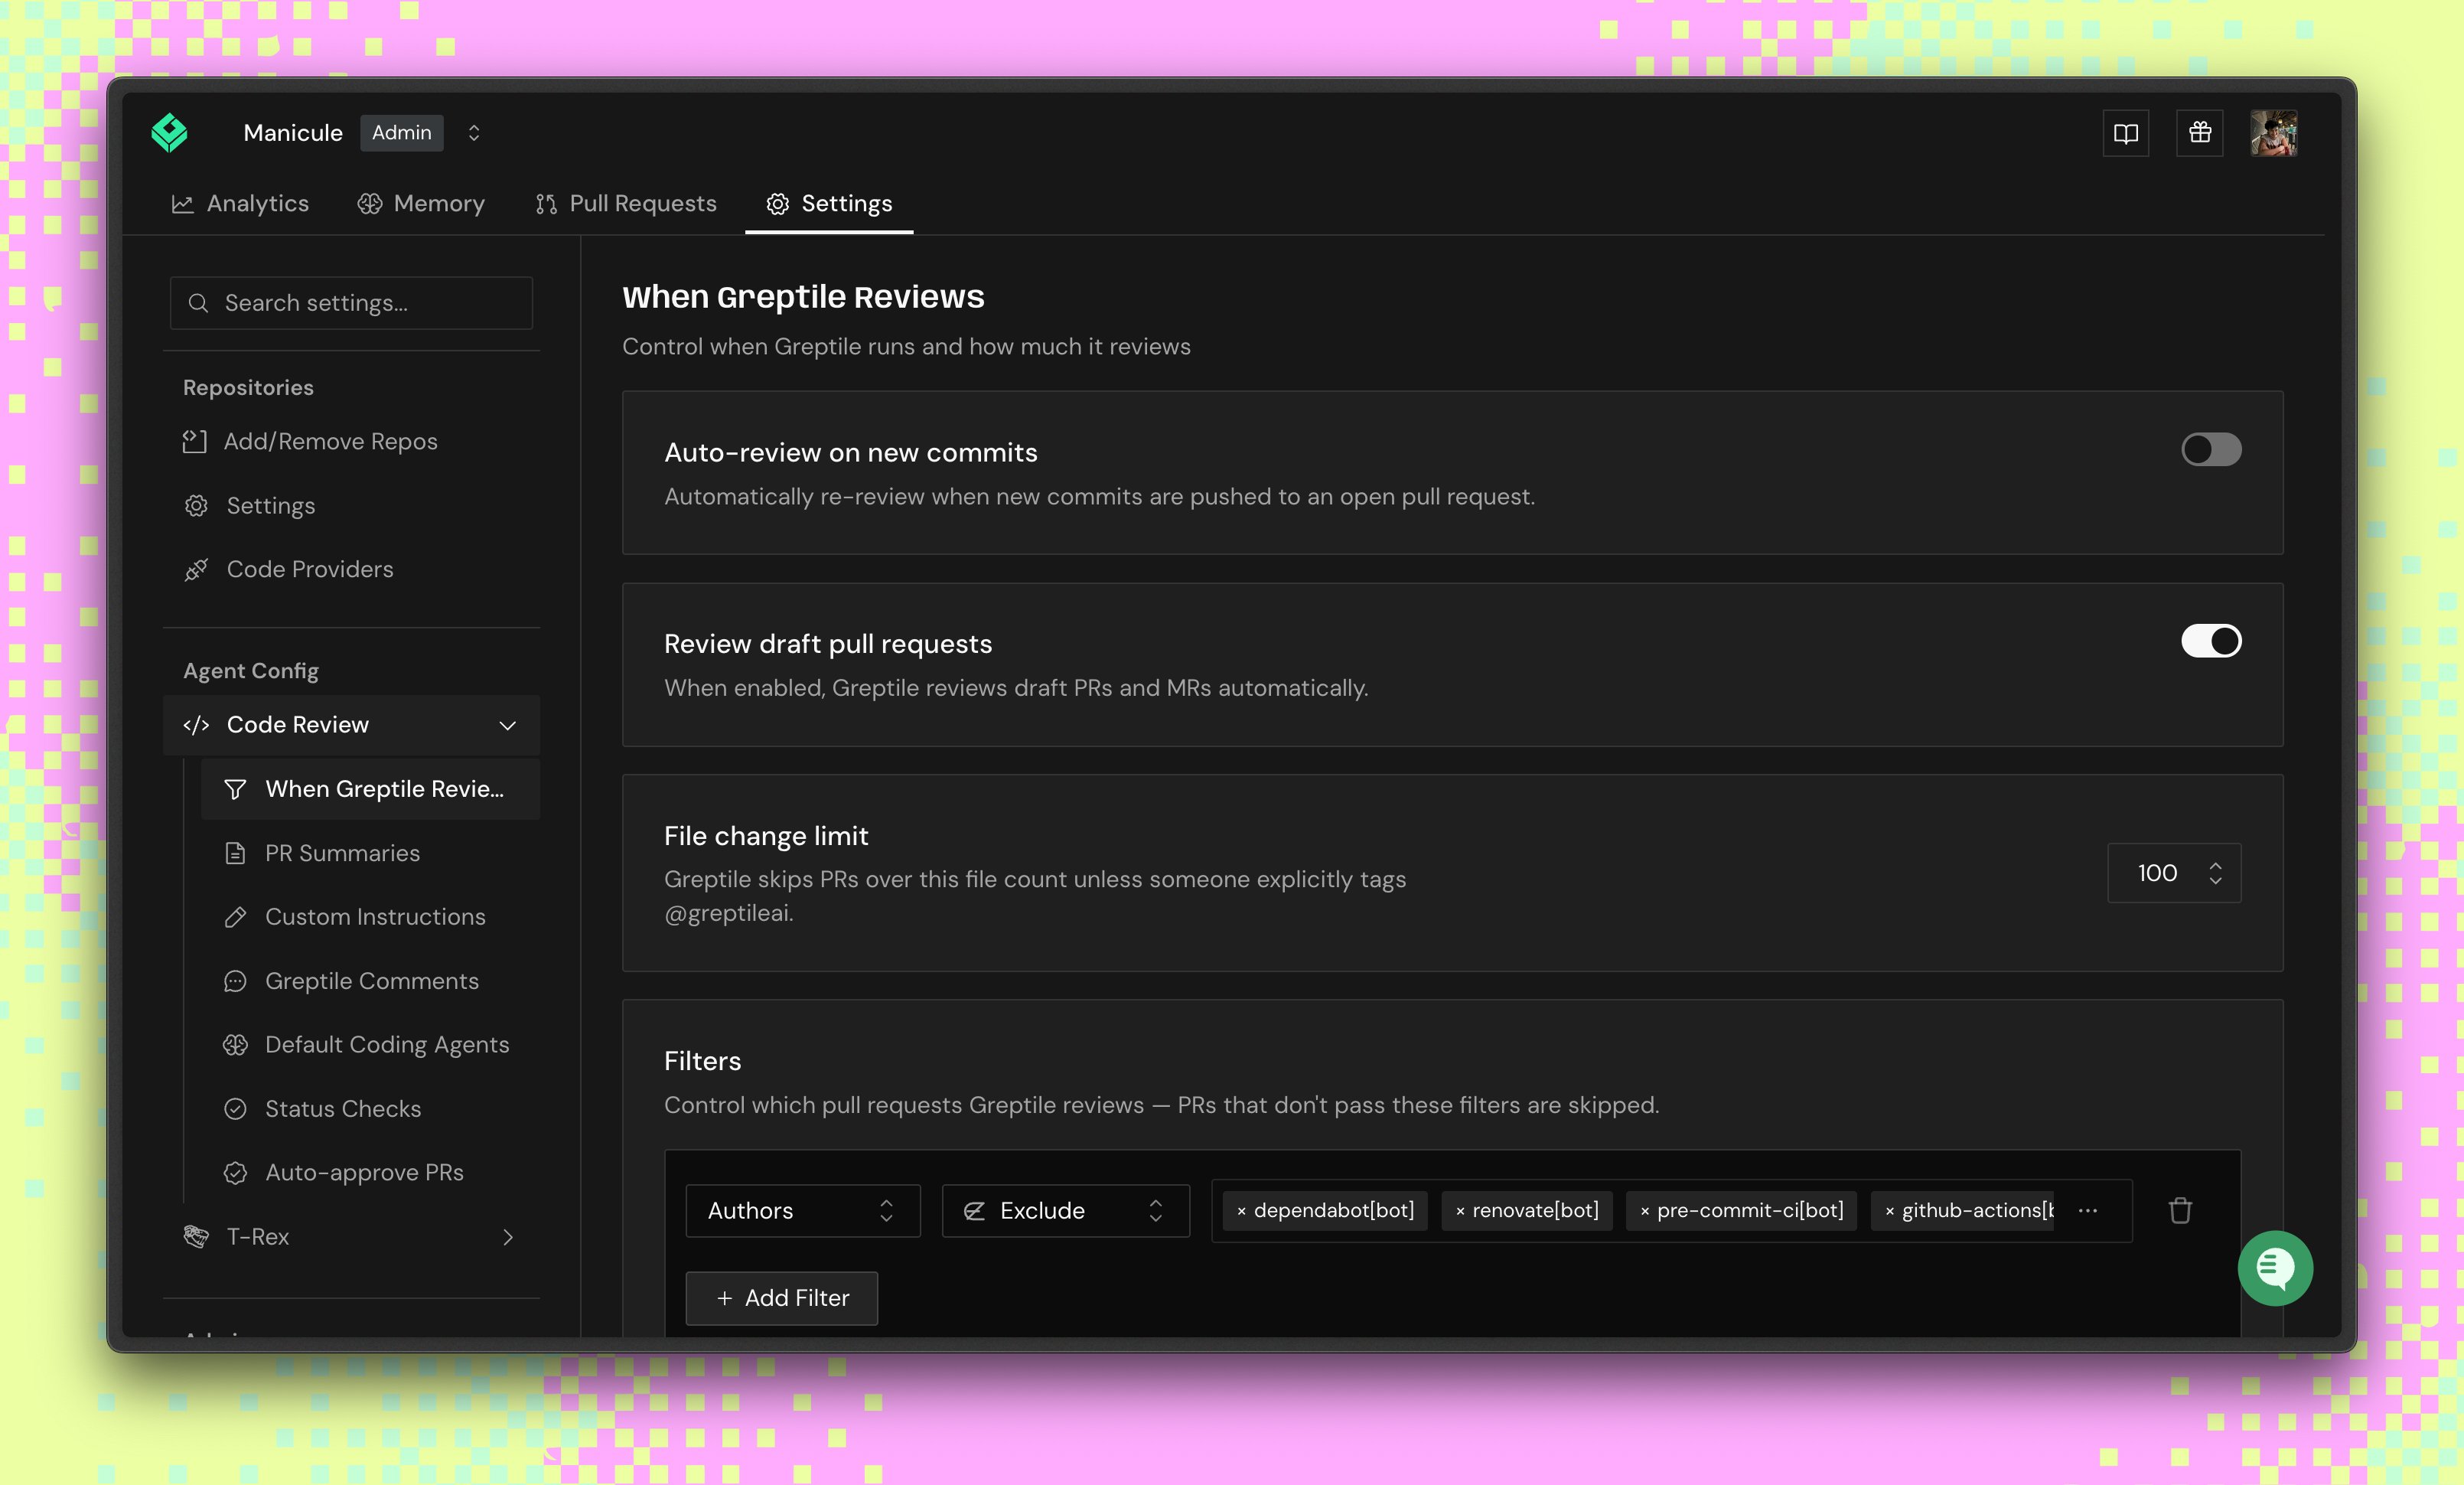
- Auto-review on new commits: Review new commits after a PR is opened
- Review draft pull requests: Review drafts before they are marked ready
- File change limit: Set the largest PR Greptile reviews automatically
- Filters: Include/exclude PRs by author, label, branch, or keyword
4
Set Comment Strictness
Choose how strict Greptile is in Code Review Settings under Greptile Comments: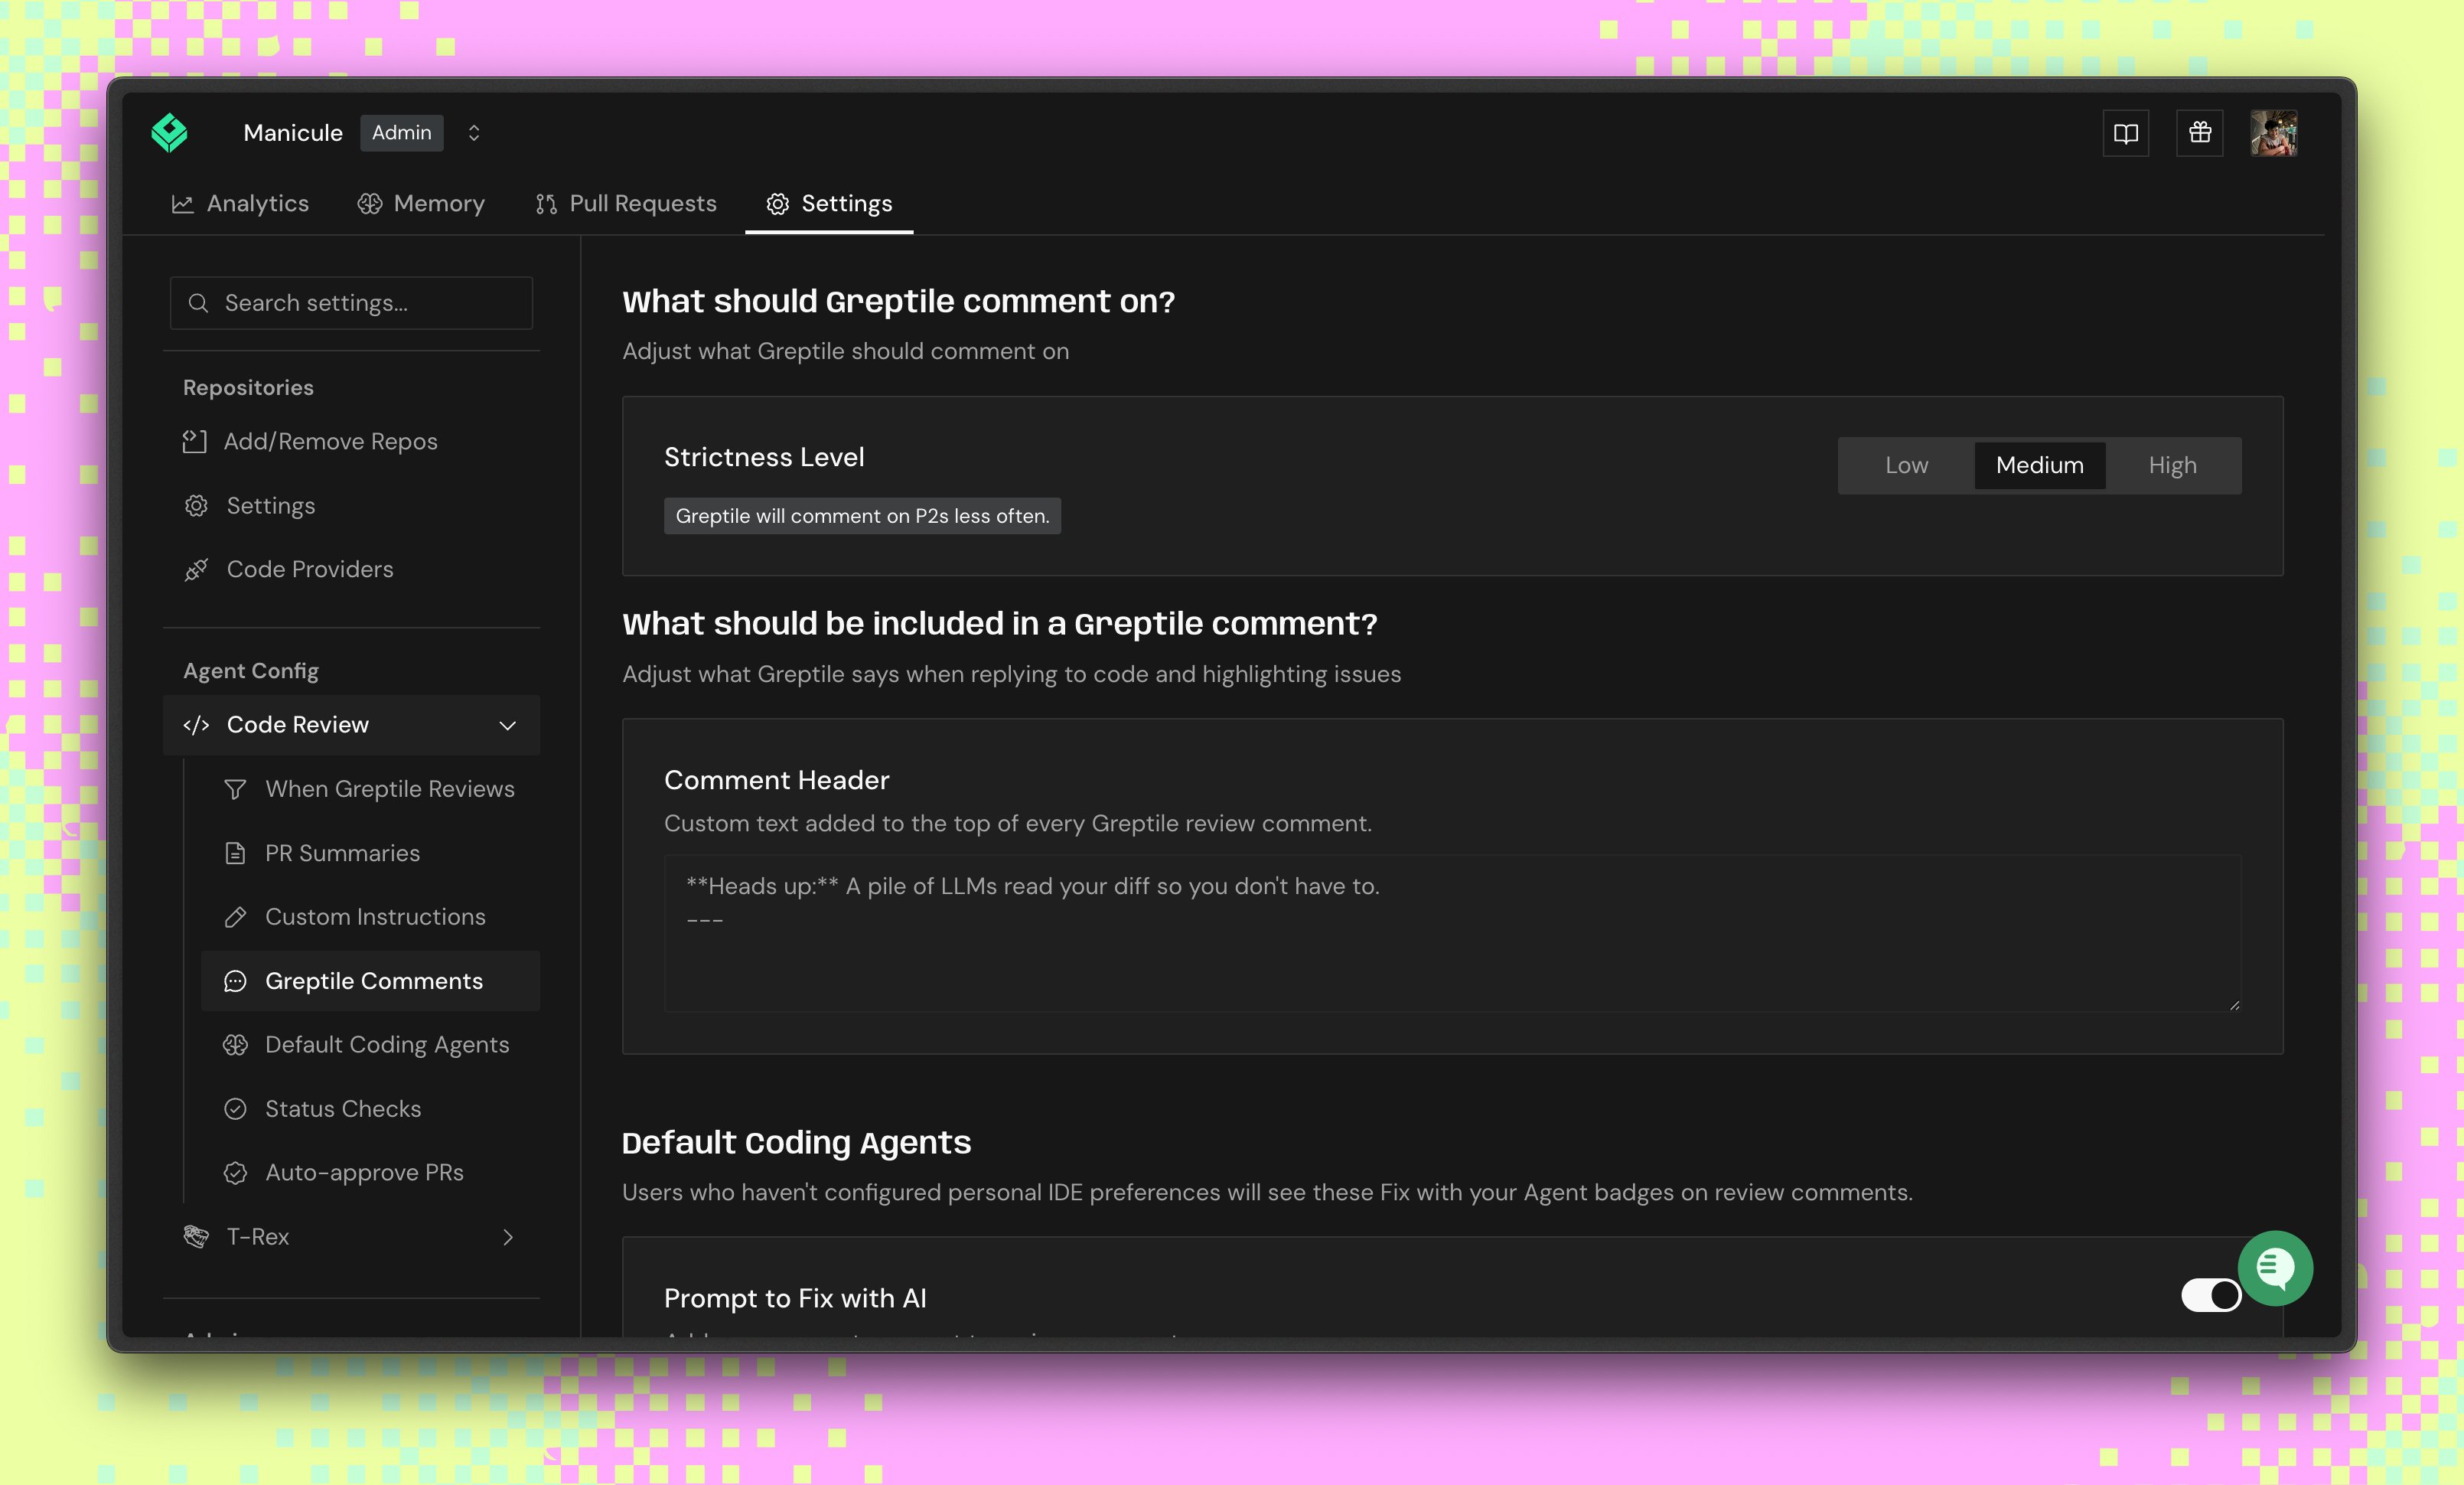
- Low: Greptile will comment on all issues
- Medium: Greptile will comment on P2s less often
- High: Greptile will never comment on P2s
Create Your First Test PR
Try Greptile on a test pull request to see it in action:1
Create a pull request
Make a test PR to your indexed repo with some code changes.
2
Wait for review (~3 minutes)
Greptile analyzes your PR with full codebase context and posts a comprehensive review.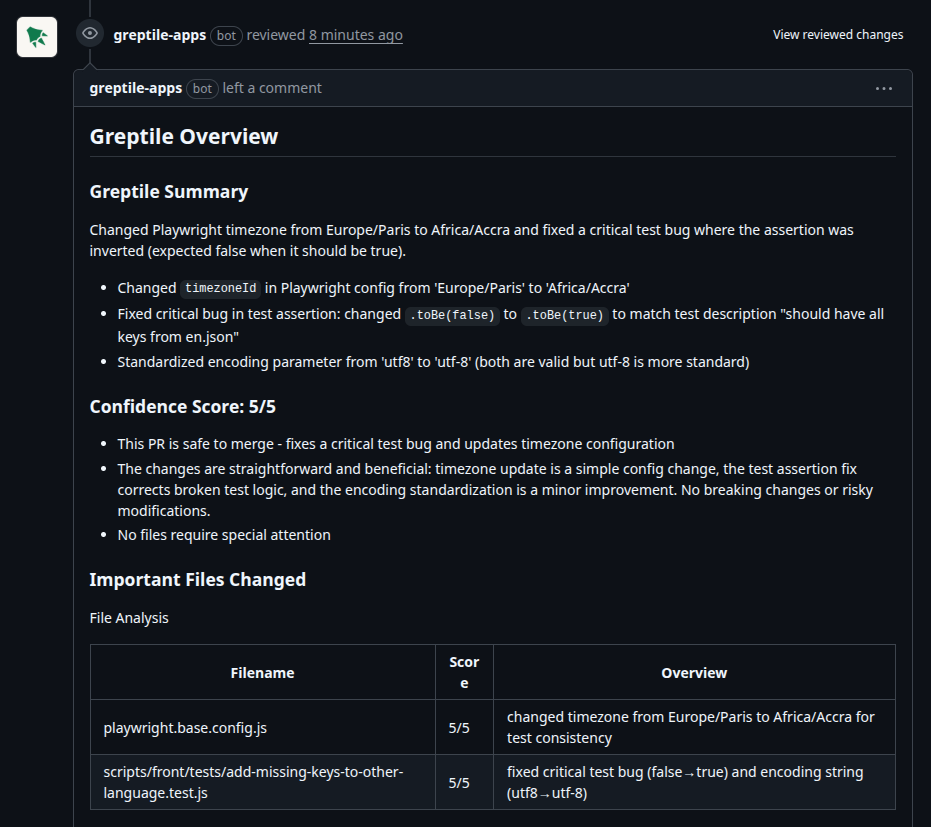
3
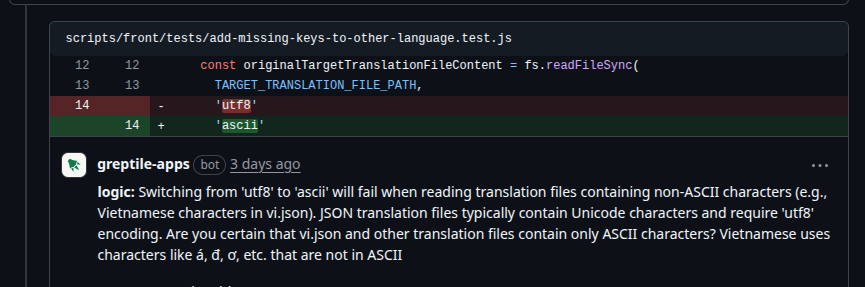
Review the feedback
You’ll see a summary of changes, inline comments on issues, and suggested fixes.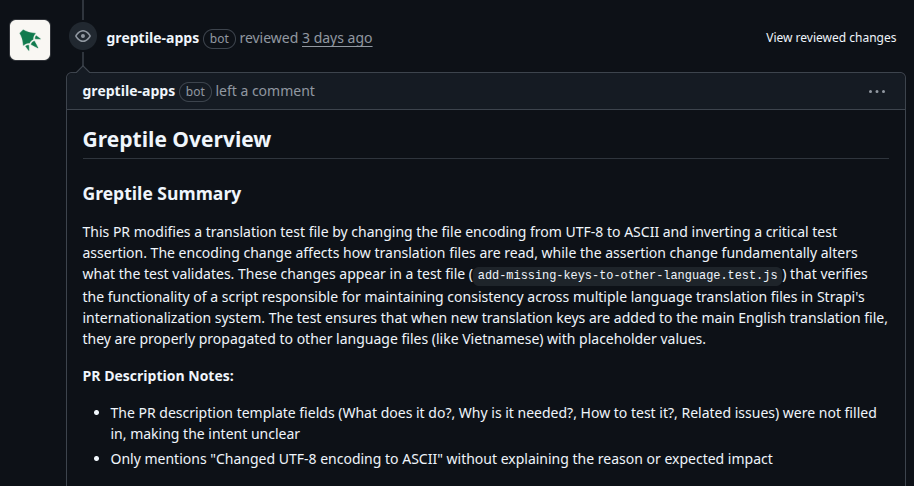
You can trigger a code review manually by tagging @greptileai with a comment. This is helpful for reviewing older PRs from before Greptile was integrated.
What’s next?
- For developers: Learn how to work with Greptile reviews →
- For team admins: Set up organizations and teams →
- Deep dive: Understand the anatomy of a review →