
Configure auto-approve
1
Open Auto-approve settings
On the Greptile dashboard, go to Code Review Settings -> Auto-approve.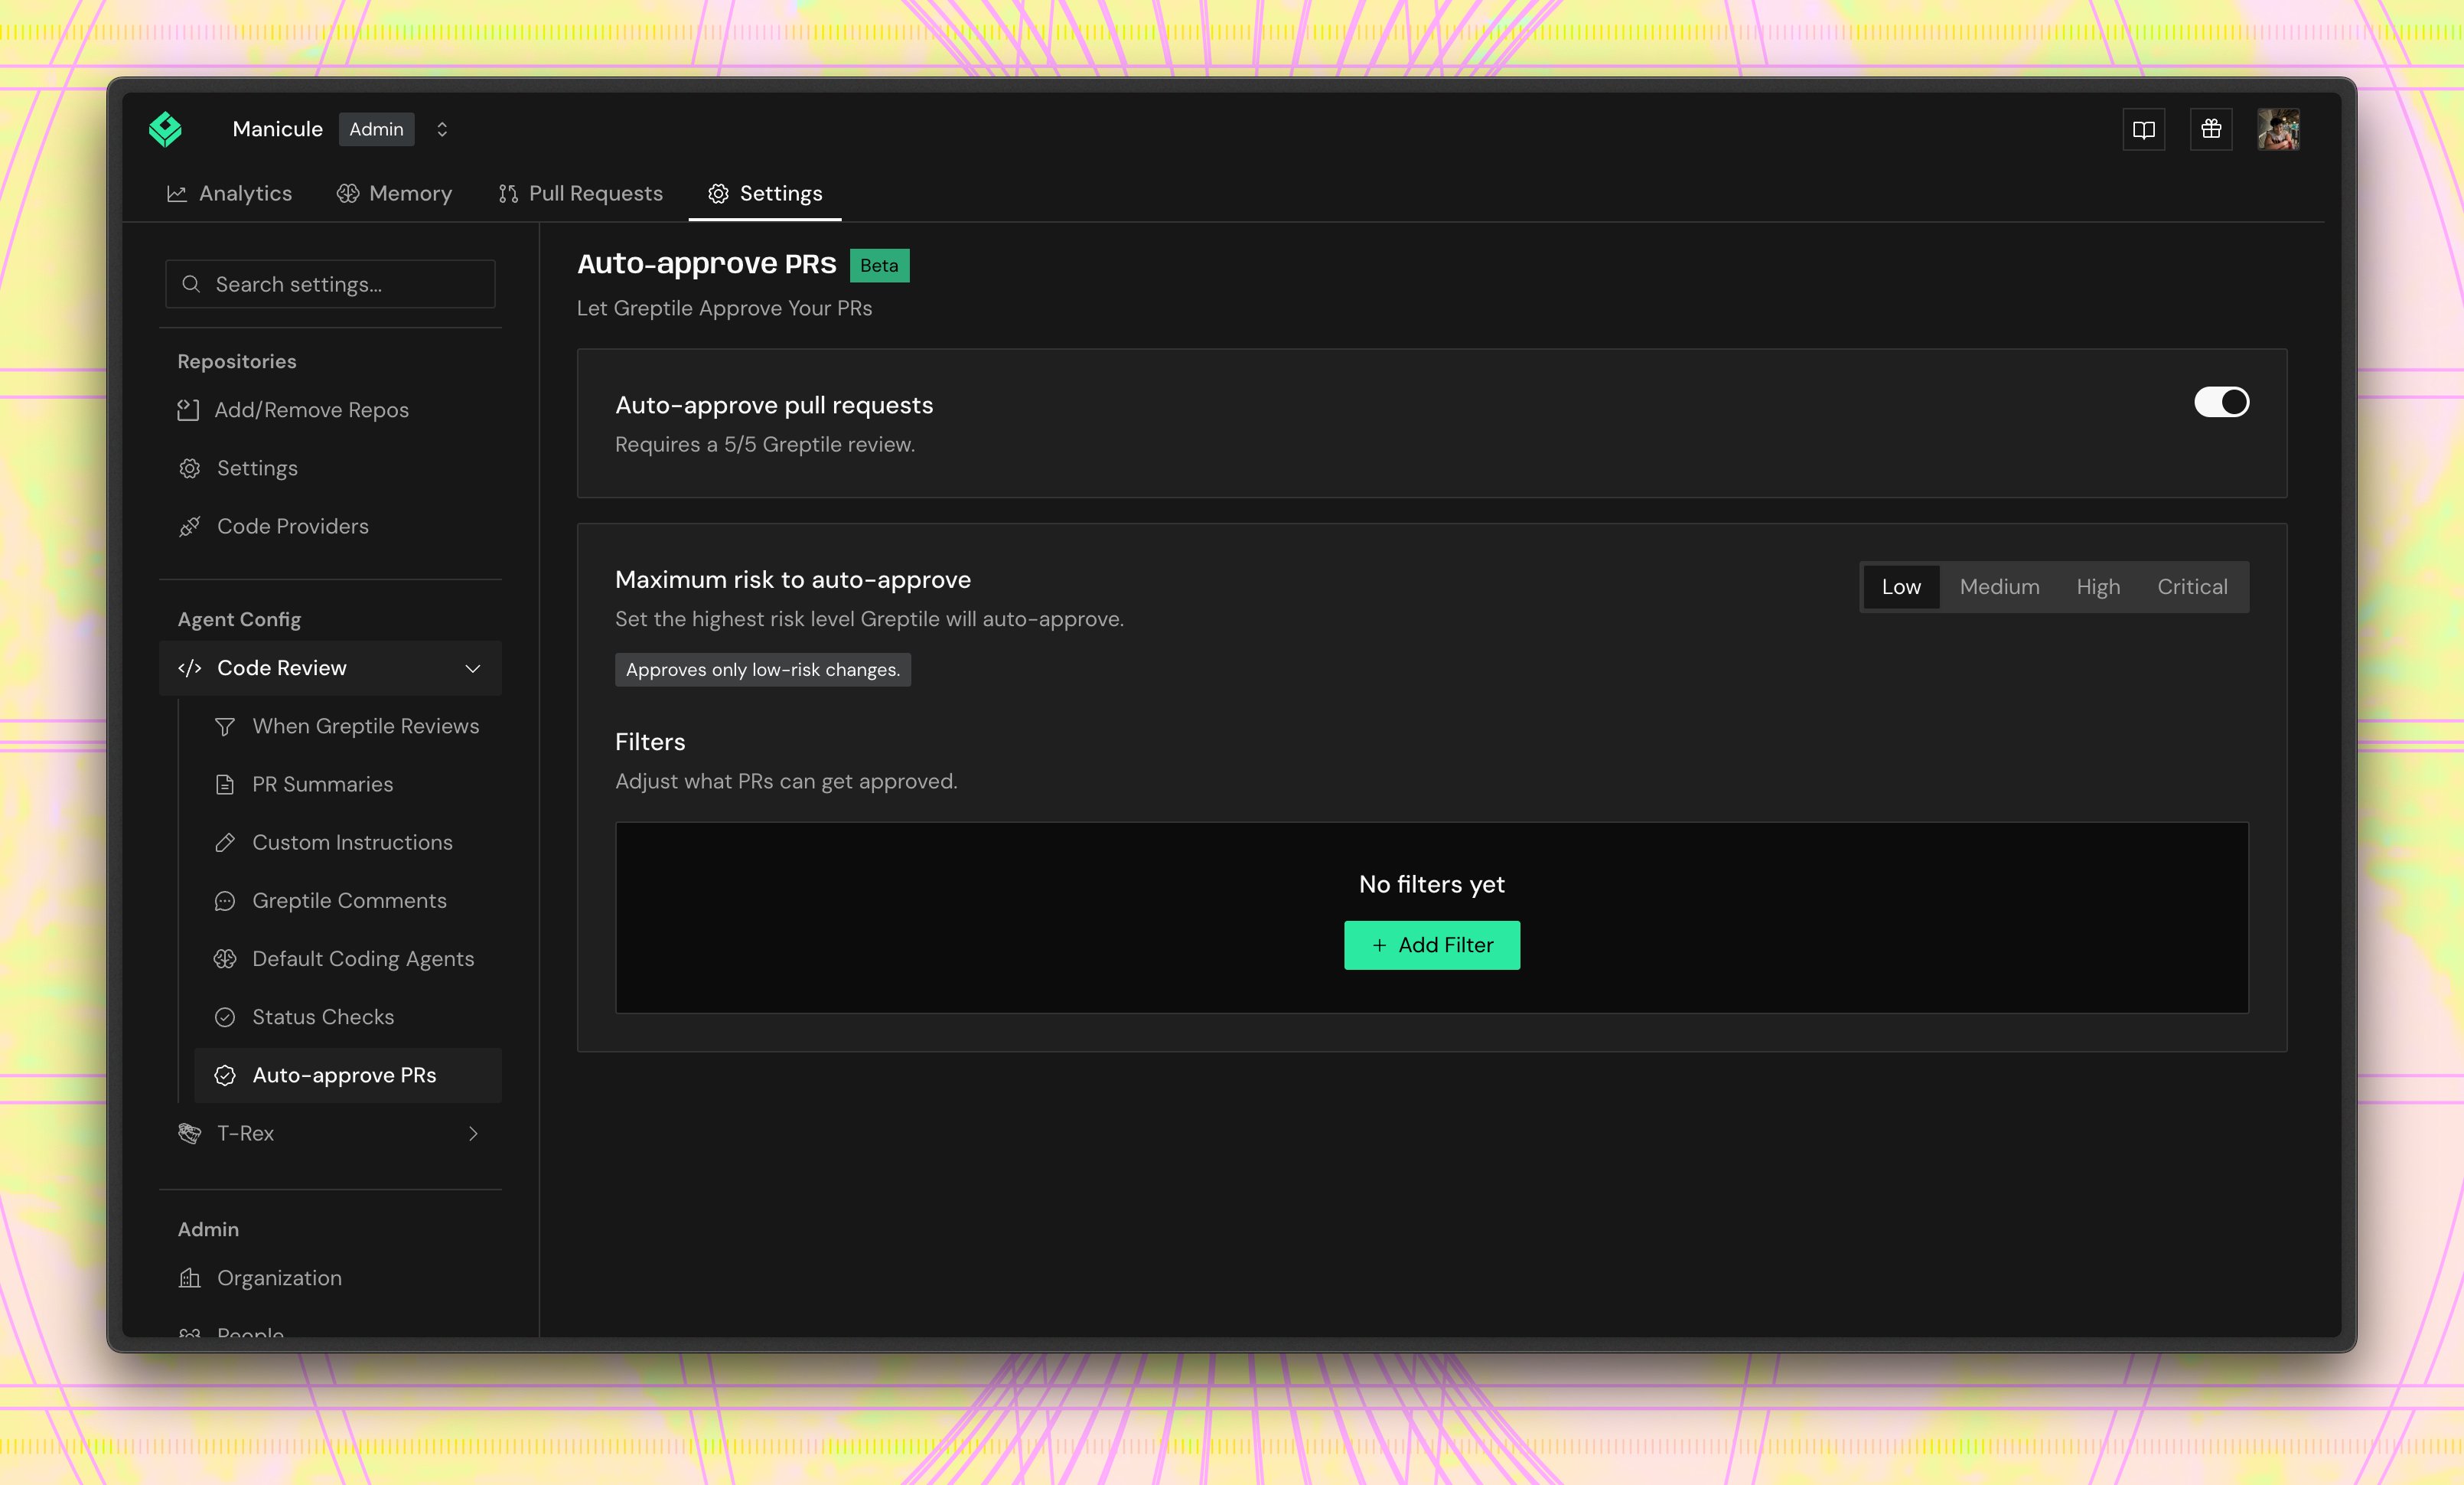
2
Enable auto-approve
Turn on Auto-approve pull requests.The toggle requires the Confidence Score review section to be on. Auto-approve reads the 5/5 score from it.
3
Set the maximum risk
Choose the highest risk level Greptile is allowed to approve. Greptile only auto-approves PRs at or below this level.Use Low for docs, tests, styling, and small code changes. Use higher levels only when you are comfortable with Greptile approving those changes without another human review.
4
Add custom instructions (optional)
Write plain-language guidance for the risk assessment, such as which parts of your codebase are riskier than they look. See Custom instructions below.
5
Add filters
Add filters for authors, repositories, target branches, labels, keywords, or paths. Each filter either includes or excludes PRs from auto-approval. Add per-repo filters in your
.greptile file.Auto-approval still requires a clean 5/5 Greptile review. If Greptile finds an issue, or the PR does not meet the configured risk threshold, it will not approve the PR.
How risk levels work
Greptile assigns every reviewed PR a risk level by reading the diff. The maximum risk setting controls the broadest class of changes Greptile can approve.- Low: docs, tests, styling, and small code changes assessed as low-risk
- Medium: ordinary application or business-logic changes
- High: dependency updates, build or runtime config, and core shared modules
- Critical: auth, secrets, billing, database migrations, infra or CI, and public APIs. At this level Greptile approves every change with a 5/5 review.
excludePaths below.
Start with Low. Raise the maximum risk only after your team has seen enough auto-approved PRs to trust the behavior for that class of change.
Custom instructions
The Custom instructions box under the risk setting takes natural-language guidance for the risk assessment that gates auto-approve. Use it to tell Greptile how risky specific kinds of changes are in your codebase:.greptile files, so a PR cannot change them.
Filters
Filters let you exclude PRs from auto-approval even when Greptile rates them as safe. Use filters for changes that need a human reviewer every time, such as:- Sensitive branches
- Release or migration labels
- Critical files or directories
- Authors whose PRs need extra review
.greptile file. When both the dashboard and a .greptile file set autoApprove, the stricter value wins for every field.
Protect specific file paths
UseexcludePaths to list paths that always require a human approval. A PR that touches any matching path is never auto-approved, even if the rest of the diff qualifies:
Limit auto-approve to specific paths
UseincludePaths to auto-approve only when every changed file matches one of the listed paths:
What always blocks auto-approval
Even with a 5/5 review inside the risk ceiling, Greptile withholds approval when:- The PR is a draft, closed, or merged by the time the review finishes
- New commits landed after the review started
- The PR carries a
do-not-mergeormanual-reviewlabel - A human reviewer has requested changes
- The PR fails any of your regular review filters (branches, labels, authors, keywords)
- The Confidence Score review section is turned off
.greptile cannot loosen the policy for itself.
When new commits are pushed to an approved PR, Greptile dismisses its earlier approval. The next review that passes every check approves again.
A withheld approval is silent. Greptile does not comment to explain why it did not approve. On GitHub the approval itself has no comment. On GitLab and Bitbucket it carries a one-line note.